Updated for Version 3.7
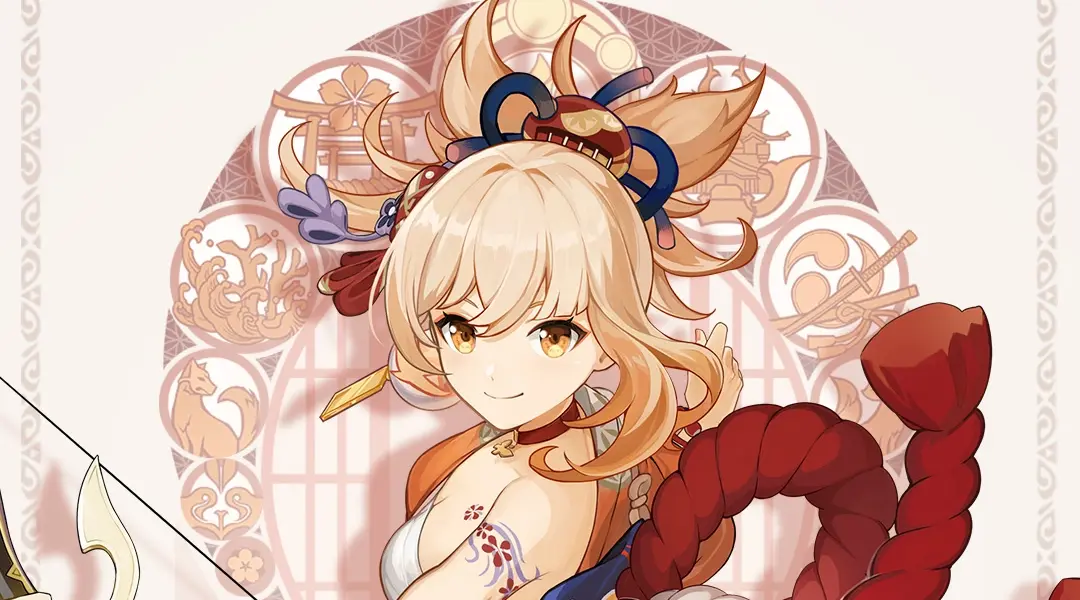
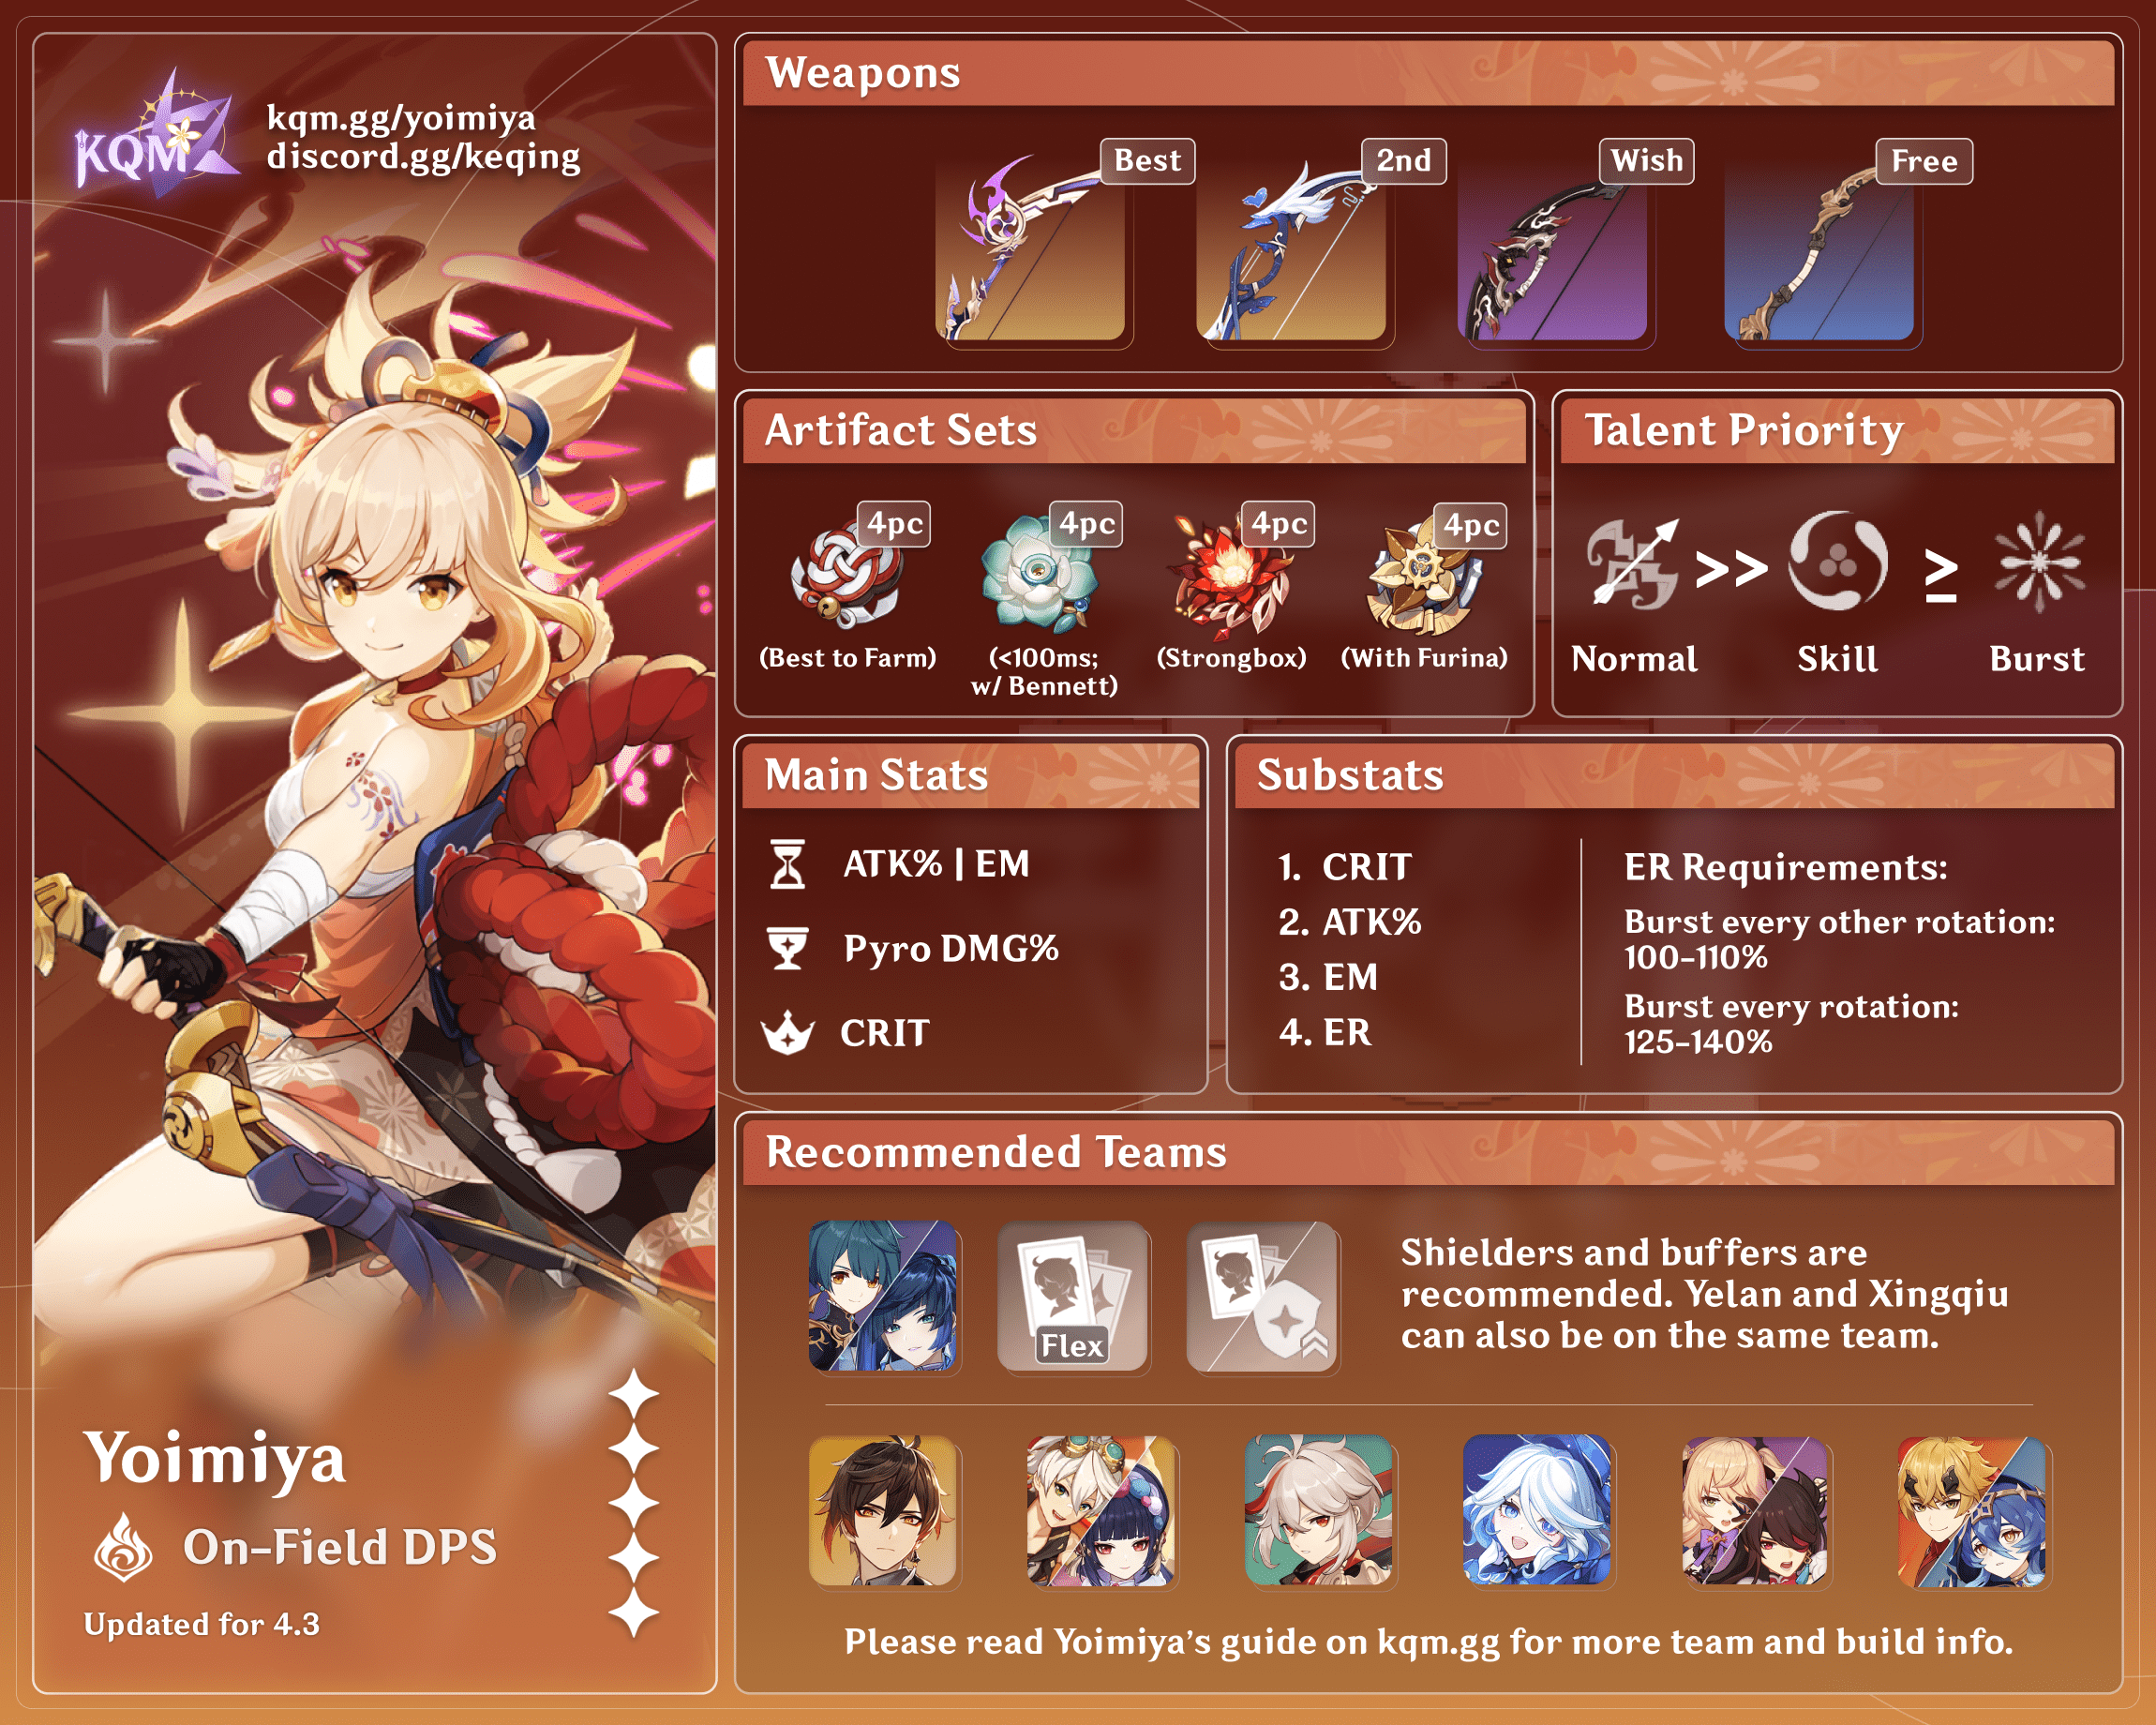
Yoimiya is a 5-star Pyro Bow character in Genshin Impact who focuses on doing single-target damage via her Normal Attacks. Learn about Yoimiya’s best builds, Talent priority, best weapons, best artifacts, and best teams in this in-depth review.
Note that the information given may change if new discoveries are made. More extensive testing is in progress.
The full-length guide is available, KQM Yoimiya Guide. It is currently being updated. Join our Discord to check on and participate in the theorycrafting process.
Table of Contents
New Content
 Gilded Dreams | An artifact set released in Version 3.0 that gives bonus EM or ATK% based on the team composition. |
 Hunter’s Path | A CRIT Rate substat 5-star Bow that can perform well as a stat stick despite the passive being rather lackluster on Yoimiya. |
 Dendro Reactions | The addition of Dendro allows for new reactions with Pyro characters. Pyro attacks can hit Dendro Cores produced by Bloom (Dendro + Hydro) to trigger Burgeon. Triggering Burgeon is not constrained by Energy or internal cooldowns. Pyro + Dendro can also cause Burning. Yoimiya lacks any particular synergy with Dendro due to the reactions. |
 Layla | A Cryo unit that consolidates shielding and off-field Cryo application. |
 Dehya | A Pyro Claymore that can be used with Yoimiya due to her defensive utility and interruption resistance. |
Infographic
Design: cuppacote
Content: irokei
Character Overview
Playstyles
Vaporize/VapeMelt/OverVape
Use an off-field Hydro applier (and an off-field Cryo/Electro applier if playing VapeMelt or OverVape) to allow Yoimiya to trigger Vaporize/Melt/Overloaded while doing her Normal Attacks.
Mono Pyro
Makes use of the power of other strong Pyro units and an Anemo character with VV to buff all of the pure Pyro damage in the team.
VV Vape
Uses an Anemo unit to buff Yoimiya’s Pyro damage alongside an off-field Hydro applier to enable Yoimiya to Vaporize her damage.
Talents
Talent Priority
Talent Priority
Normal Attack >> Skill > Burst
Yoimiya greatly appreciates levels in her Normal Attack multipliers as it is her kit’s main source of damage. After that, her Elemental Skill takes priority, with her Elemental Burst being the least important out of the three to level.
A common misconception among characters that have a Normal, Charged or Plunging Attack steroid on their Elemental Skill or Burst, is that you should level said ability before your Normal Attack Talent; this is incorrect. The character’s NA Talent is far more important than their steroid and Yoimiya is no exception. However, this doesn’t mean that Elemental Skill Talent levels should be ignored.
Talent Overview
![]() Normal Attack | Firework Flare-Up
Normal Attack | Firework Flare-Up
Talent Description
Normal Attack
Performs up to 5 consecutive shots with a bow.
Charged Attack
Perform a more precise Aimed Shot with increased DMG.
While aiming, flames will accumulate on the arrowhead before being fired off as an attack. Has different effects based on how long the energy has been charged:
- Charge Level 1: Fires off a flaming arrow that deals Pyro DMG.
- Charge Level 2: Generates a maximum of 3 Kindling Arrows based on time spent charging, releasing them as part of this Aimed Shot. Kindling Arrows will home in on nearby opponents, dealing Pyro DMG on hit.
Plunging Attack
Fires off a shower of arrows in mid-air before falling and striking the ground, dealing AoE DMG upon impact.
Yoimiya’s Normal Attacks (NA’s) are the cornerstone of her entire kit and make up a vast majority of her damage output, so prioritize leveling them over the rest of her Talents.
Yoimiya has 5 attacks in her Normal Attack string, some of which are multi-hits (1st and 4th hits are split into two separate hits) which enables her to trigger reactions like Vaporize on the 5th hit of her Normal Attack string. This 5th hit in particular does a significant portion of her overall damage, making it extremely important to get out her N5.
Yoimiya’s Charged Attack and Kindling Arrows are barely used and contribute little to her overall kit.
![]() Elemental Skill | Niwabi Fire-Dance
Elemental Skill | Niwabi Fire-Dance
Talent Description
Yoimiya waves a sparkler and causes a ring of saltpeter to surround her.
Niwabi Enshou
During this time, arrows fired by Yoimiya’s Normal Attack will be Blazing Arrows, and their DMG will be increased and converted to Pyro DMG.
During this time, Normal Attack: Firework Flare-Up will not generate Kindling Arrows at Charge Level 2.
This effect will deactivate when Yoimiya leaves the field.
Yoimiya’s Elemental Skill infuses her Normal Attacks with Pyro and increases the damage of her Normal Attacks by a percentage that scales with Talent levels. Her Pyro-infused Normal Attacks follow standard ICD as well.
The damage Yoimiya does with her Normal Attacks while in Niwabi Fire-Dance is considered Normal Attack damage, meaning that it can be buffed by other Normal Attack buffs like Rust and Thundering Pulse’s passives.
![]() Elemental Burst | Ryuukin Saxifrage
Elemental Burst | Ryuukin Saxifrage
Talent Description
Yoimiya leaps into the air along with her original creation, the “Ryuukin Saxifrage,” and fires forth blazing rockets bursting with surprises that deal AoE Pyro DMG and mark one of the hit opponents with Aurous Blaze.
Aurous Blaze
All Normal/Charged/Plunging Attacks, Elemental Skills, and Elemental Bursts by any party member other than Yoimiya that hit an opponent marked by Aurous Blaze will trigger an explosion, dealing AoE Pyro DMG.
When an opponent affected by Aurous Blaze is defeated before its duration expires, the effect will pass on to another nearby opponent, who will inherit the remaining duration.
One Aurous Blaze explosion can be triggered every 2s. When Yoimiya is down, Aurous Blaze effects created through her skills will be deactivated.
Yoimiya’s Elemental Burst makes her shoot a firework at an enemy that applies a debuff to them. When Yoimiya’s teammates hit enemies marked with the debuff, it will deal a small amount of AoE Pyro damage. If the debuffed enemy dies and there is another enemy nearby, the debuff will be passed onto them.
Generally, Yoimiya’s Burst is used at the beginning of your rotation to allow your teammates to not only trigger reactions with it but also get the small ATK% buff from her Ascension 4 Passive.
Since her Elemental Burst is rather lackluster and she is commonly run with the 4-piece Shimenawa’s Reminiscence, it is generally recommended to use herBurst whenever it is available and not every rotation.
![]() Ascension 1 Passive | Tricks of the Trouble-Maker
Ascension 1 Passive | Tricks of the Trouble-Maker
Talent Description
During Niwabi Fire-Dance, shots from Yoimiya’s Normal Attack will increase her Pyro DMG Bonus by 2% on hit. This effect lasts for 3s and can have a maximum of 10 stacks.
During Yoimiya’s Elemental Skill, hits from her Normal Attacks increase her Pyro DMG Bonus by 2% per hit. This buff lasts for 3s and has a maximum of 10 stacks. It’s worth noting that some attacks in Yoimiya’s Normal Attack pattern are multi-hits, meaning that each individual hit gives her a bonus (e.g. Yoimiya’s N1 gives her 2 stacks which is 4% Pyro DMG Bonus). At max stacks, Yoimiya can get up to a 20% Pyro DMG Bonus.
![]() Ascension 4 Passive | Summer Night’s Dawn
Ascension 4 Passive | Summer Night’s Dawn
Talent Description
Using Ryuukin Saxifrage causes nearby party members (not including Yoimiya) to gain a 10% ATK increase for 15s. Additionally, a further ATK Bonus will be added on based on the number of “Tricks of the Trouble-Maker” stacks Yoimiya possesses when using Ryuukin Saxifrage. Each stack increases this ATK Bonus by 1%.
After Yoimiya unleashes her Elemental Burst, her party members receive a 10% ATK buff for 15s. This buff increases based on the number of stacks Yoimiya has from her A1 Passive; each stack increases the ATK% buff by 1% for a maximum of 10% extra. This allows for a potential 20% ATK buff from her Elemental Burst.
Constellations
![]() Constellation 1 | Agate Ryuukin
Constellation 1 | Agate Ryuukin
The Aurous Blaze created by Ryuukin Saxifrage lasts for an extra 4s.
Additionally, when an opponent affected by Aurous Blaze is defeated within its duration, Yoimiya’s ATK is increased by 20% for 20s.
Increases the duration of her Elemental Burst marker. Also gives a 20% ATK buff to Yoimiya upon defeating an enemy marked with her Burst. Underwhelming Constellation due to her Burst being a small portion of her overall damage and the buff being extremely conditional.
![]() Constellation 2 | A Procession of Bonfires
Constellation 2 | A Procession of Bonfires
When Yoimiya’s Pyro DMG scores a CRIT Hit, Yoimiya will gain a 25% Pyro DMG Bonus for 6s.
This effect can be triggered even when Yoimiya is not the active character.
When any of Yoimiya’s Pyro attacks crit she gains a 25% Pyro DMG buff. Note that this Constellation can also be triggered while she is off-field and cannot stack. One of Yoimiya’s better Constellations.
![]() Constellation 3 | Trickster’s Flare
Constellation 3 | Trickster’s Flare
Increase the Level of Niwabi Fire-Dance by 3.
Maximum upgrade level is 15.
Increases Yoimiya’s Elemental Skill Talent by 3 levels. Since Talent levels don’t do much for her overall DPS, this Constellation is a rather minor increase in damage.
![]() Constellation 4 | Pyrotechnic Professional
Constellation 4 | Pyrotechnic Professional
When Yoimiya’s own Aurous Blaze triggers an explosion, Niwabi Fire-Dance’s CD is decreased by 1.2.
When Yoimiya’s Burst marker triggers on an enemy, the cooldown of her Skill will be reduced by 1.2s per explosion. While this Constellation sounds good on paper, it doesn’t actually do much, since almost all of her rotations need the downtime on her Elemental Skill to set up teammate Bursts and Skills. This Constellation mainly shines in Co-Op scenarios for this reason.
![]() Constellation 5 | A Summer Festival’s Eve
Constellation 5 | A Summer Festival’s Eve
Increases the Level of Ryuukin Saxifrage by 3.
Maximum upgrade level is 15.
Increases Yoimiya’s Elemental Burst Talent by 3 levels. Similarly to her C3, extra levels into her Burst is rather pointless since only a small portion of her damage actually relies on it.
![]() Constellation 6 | Naganohara Meteor Swarm
Constellation 6 | Naganohara Meteor Swarm
During Niwabi Fire-Dance, Yoimiya’s Normal Attacks have a 50% chance of firing an extra Blazing Arrow that deals 60% of its original DMG. This DMG is considered Normal Attack DMG.
During Yoimiya’s Elemental Skill, her Normal Attacks have a 50% chance to fire an additional arrow that deals 60% of the original damage (the damage this deals is considered Normal Attack damage). This is easily Yoimiya’s best Constellation; it gives her anywhere from a 20-30% DPS increase. Note that due to the additional arrow sharing ICD with Yoimiya’s Normal Attacks, it can mess up her Vaporize pattern (not being able to Vaporize her N5). For a more detailed explanation read the Constellations section for the in-depth guide.
Combos
N# = Corresponding number of consecutive Normal Attacks
D = Dash
| Combo | Usage |
| N5D | Due to a lot of Yoimiya’s damage coming from her N5 hit, it is important to get it off. That being said, this makes her combo relatively straightforward; you just spam your Normal Attacks and dash at the end to cancel her N5 end animation. |
Artifacts
ER Requirements
Yoimiya’s ER requirements heavily depend on her teams and whether or not you use 4SR. This combined with Yoimiya’s Burst not being great in the first place means that you should just Burst whenever it’s available (assuming you can still proc 4SR). Building extra ER to Burst consistently results in a DPS loss, so it is generally not recommended.
Use the Energy Recharge Calculator to determine exact requirements for your team and rotation.
Artifact Stats
 Sands |  Goblet |  Circlet |
| ATK% / EM | Pyro DMG% | CRIT Rate / CRIT DMG |
Substats: CRIT > ATK% > EM > ER > Flat ATK
EM can become more important than ATK% in teams where Yoimiya is triggering reactions. In these teams, it is recommended to get around 100-200 EM on her.
Artifact Sets
4pc Shimenawa Reminiscence (SR) | Generally Yoimiya’s Best in Slot artifact set and Resin-efficient to farm with Emblem of Severed Fate. |
 4pc Crimson Witch of Flames (CW) | This set slightly beats 4pc SR in teams where she triggers reactions like Vaporize and Overloaded. |
4pc Gilded Dreams (GD) | A competitive option for Yoimiya in teams where the EM is valuable for her (e.g. Vaporize). This set is also very Resin-efficient, as it shares a Domain with Deepwood Memories. |
 4pc Echoes of an Offering | Generally less advised compared to the artifacts above due to this artifact set being ping-dependent, where players with higher ping will have worse results, as well as being dependent on RNG. |
 4pc Lavawalker | Only really viable in Mono Pyro teams. It is not advised to farm specifically for this set. |
 4pc Retracing Bolide | This set is only viable with a shielder that has or almost has 100% uptime on their shield. This set is not worth specifically farming for. |
 2pc combinations of Crimson Witch of Flames, +18% ATK and +80 EM sets | These sets can be situationally strong if players have very good substats on them and no good 4pc set. They can also be good transitionary sets for those who are still farming. |
Weapons
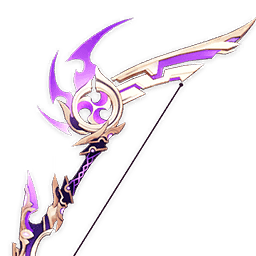 Thundering Pulse | Yoimiya’s signature 5-star weapon. It synergizes perfectly with her and functions as her BiS. |
 Aqua Simulacra | A huge stat stick. If you can take advantage of the 20% DMG increase from being close to the enemy, it can be competitive. |
 Polar Star | Another CRIT 5-star weapon that is also competitive for Yoimiya but can be outperformed by a high-refined Rust. It is important to pre-stack Polar Star by doing an Aimed Shot before entering Yoimiya’s Elemental Skill. |
Hunter’s Path | A competitive 5-star weapon due to the abundance of CRIT stats and DMG% the weapon gives. |
 Rust | At R1-R3 this weapon is generally worse than Slingshot R5 and is not recommended to use unless you have high refinements on it. At R4-R5 it becomes very competitive and competes with previously mentioned 5-star CRIT weapons. |
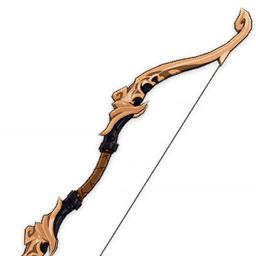 Slingshot R5 Slingshot R5 | Yoimiya’s most F2P friendly weapon performs extremely well on her. Despite being a 3-star weapon, the amount of damage it can give Yoimiya at R5 is quite surprising and shouldn’t be underestimated. This weapon can even outperform Rust R5 in some situations with Bennett and Yun Jin. It is recommended to use Bennett with this weapon to make up for its low Base ATK. |
Teams
Teambuilding
- Yoimiya’s best teams revolve around Vaporizing her Normal Attacks, so having an off-field Hydro applier that works with her is extremely important.
- Having some form of interruption resistance that allows Yoimiya to consistently Vaporize her Normal Attack pattern is also recommended.
Notable Teammates
  Kazuha, Sucrose | Both characters offer grouping, buffing and debuffing via the 4pc VV artifact set. Sucrose offers a teamwide EM buff and Kazuha offers a Elemental DMG% buff for characters with the Swirled Element(s). Kazuha’s ability to buff and debuff multiple Elements is greatly appreciated (Sucrose as well but to a lesser extent). |
 Diona | Provides a decent shield along with healing and relatively slow Cryo application on her Burst. At C6, her EM buff can be quite valuable as well. A viable defensive option. |
 Layla | Layla can be built for her shield or a mix of shielding and damage. Her Cryo application allows for some Melts on enemies that can be Frozen. She can also buff Yoimiya’s damage via 4pc Tenacity of the Millileth. |
  Beidou, Yae Miko | Beidou and Yae Miko have value with Yoimiya especially in AoE to make up for Yoimiya’s lack thereof. However, both come with their fair share of issues (Beidou’s Burst cost and Yae’s field time requirements being some examples). |
 Fischl | Fischl is a lot more synergistic with Yoimiya since she has low field time requirements and her C6 works well with her. |
 Candace | Candace does NOT fill the role of an off-field Hydro applier for Yoimiya similar to Xingqiu or Yelan; her role in Yoimiya teams is that of a buffer similar to Yun Jin, albeit worse. Candace becomes a lot more competitive with her C6; without it, using her isn’t recommended. |
 Xingqiu | Xingqiu’s defensive utility combined with his Hydro application and damage makes him an amazing option for Yoimiya. It should be noted that while hiss interruption resistance is quite strong, it is not a substitute for a shielder. |
 Yelan | Yelan has the potential to outperform Xingqiu within Yoimiya teams, especially if you already have a source of defensive utility (e.g. Zhongli); she can also allow for shorter rotations. Yelan’s ramping damage buff synergizes extremely well since Yoimiya’s highest damage hit is at the end of her combo. |
 Albedo | Albedo’s short field time and consistent damage via his Elemental Skill synergizes quite well with Yoimiya. While his Burst can be quite underwhelming despite its EM buff, he is still a good choice for an off-field DPS. |
 Yun Jin | Yun Jin tends to be one of Yoimiya’s best teammates and can be on par with Bennett in terms of how much she buffs Yoimiya’s DPS via her Elemental Burst. |
 Zhongli | Zhongli’s shield lets Yoimiya pull off her Normal Attack string without getting interrupted and provides Elemental RES Shred. |
 Bennett | Bennett gives Yoimiya a large Flat ATK buff during her Elemental Skill’s uptime, significantly increasing her damage. |
 Dehya | Dehya’s almost infinite interruption resistance and damage mitigation, which can help Yoimiya finish her Normal Attack string, does have value. However, this is basically all she does because she does not act as a substitute for a healer or shielder. |
  Thoma, Yanfei (C4+) | Thoma and Yanfei both can fill the role of a shield, with Thoma generally being the preferred option. |
 Xiangling | Xiangling can be used as an off-field DPS in Mono Pyro teams with Yoimiya. |
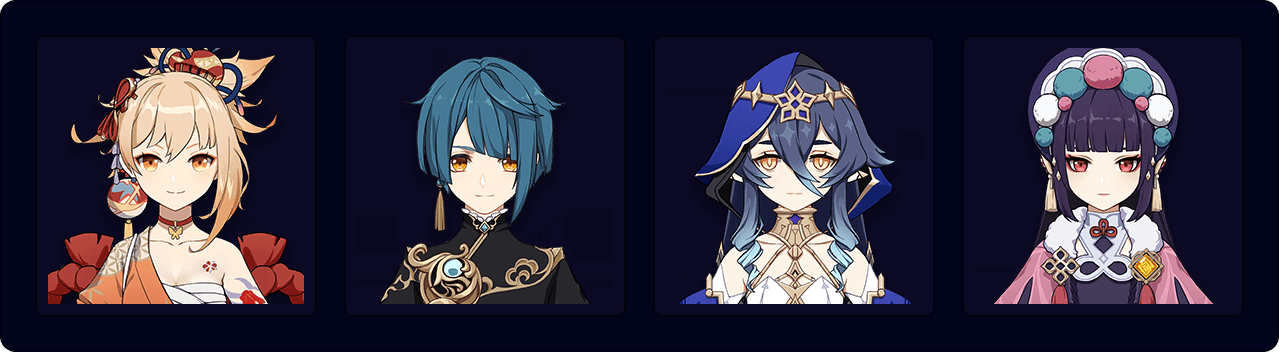
Vaporize Variations

Yoimiya’s most common and best performing team archetype. By utilizing Xingqiu or Yelan for off-field Hydro application, Yoimiya is able to easily Vaporize her Normal Attacks. The last two slots are quite flexible; they can be a shielder, a buffer, another Hydro off-field DPS, or even another Elemental applier to enable VapeMelt / OverVape.
Example Teams
This is not a comprehensive list of teams. The inclusion or exclusion of any given team does not necessarily reflect its power level.
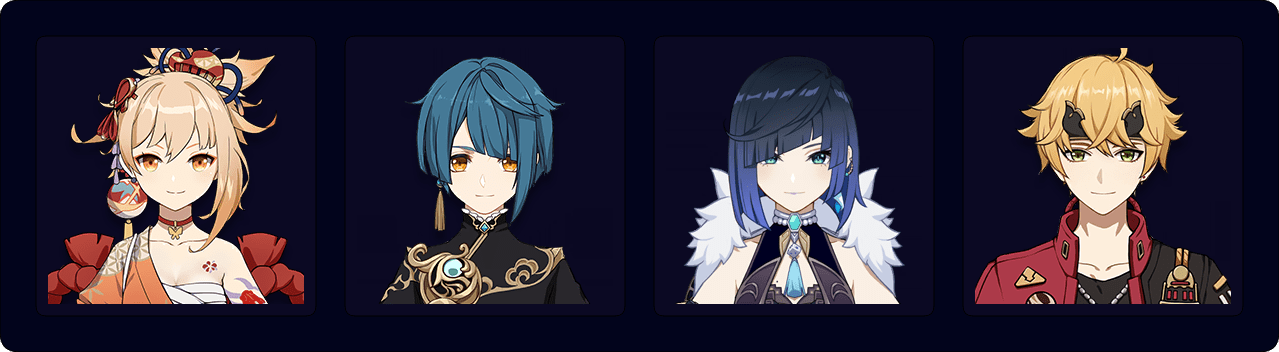

Mono Pyro

This team uses Bennett and Yoimiya alongside a Pyro unit flex with an Anemo buffer or Zhongli to buff pure Pyro damage. Xiangling is most commonly used as the Pyro flex and for good reason.
Example Teams
This is not a comprehensive list of teams. The inclusion or exclusion of any given team does not necessarily reflect its power level.
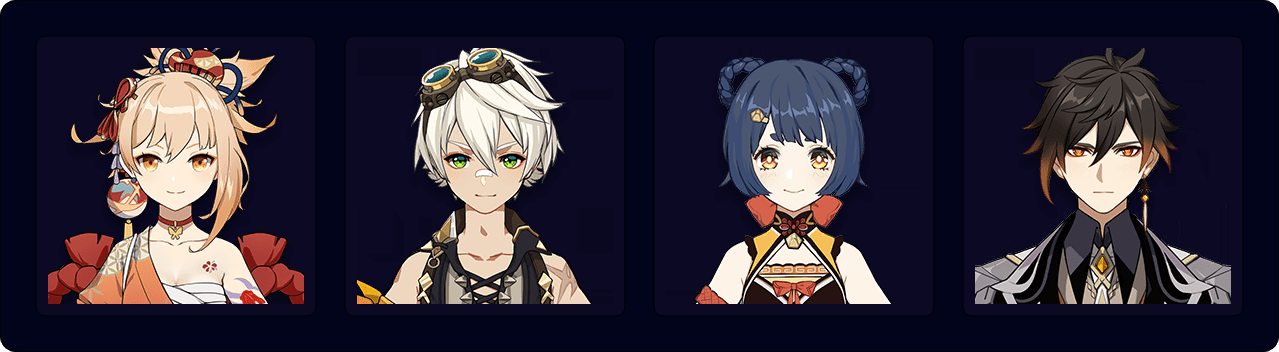

VV Vape
Viridescent Venerer Vaporize teams (VV Vape) main goal is to buff Yoimiya’s damage as much as possible. In these teams, slotting in defensive utility can be quite difficult, especially since you want another Pyro unit to Swirl Pyro for the 4pc VV debuff. The setups for these teams can be quite complex with the most optimal rotations Swirling both Hydro and Pyro to apply the 4pc VV debuff and potentially other buffs to both Elements.
Example Teams
This is not a comprehensive list of teams. The inclusion or exclusion of any given team does not necessarily reflect its power level.


Credits
.reimu., idkanonymized, nikatosaurus, Leah, chasing_haze
Team images courtesy of the KQM portrait generator.