Updated for Version 4.0
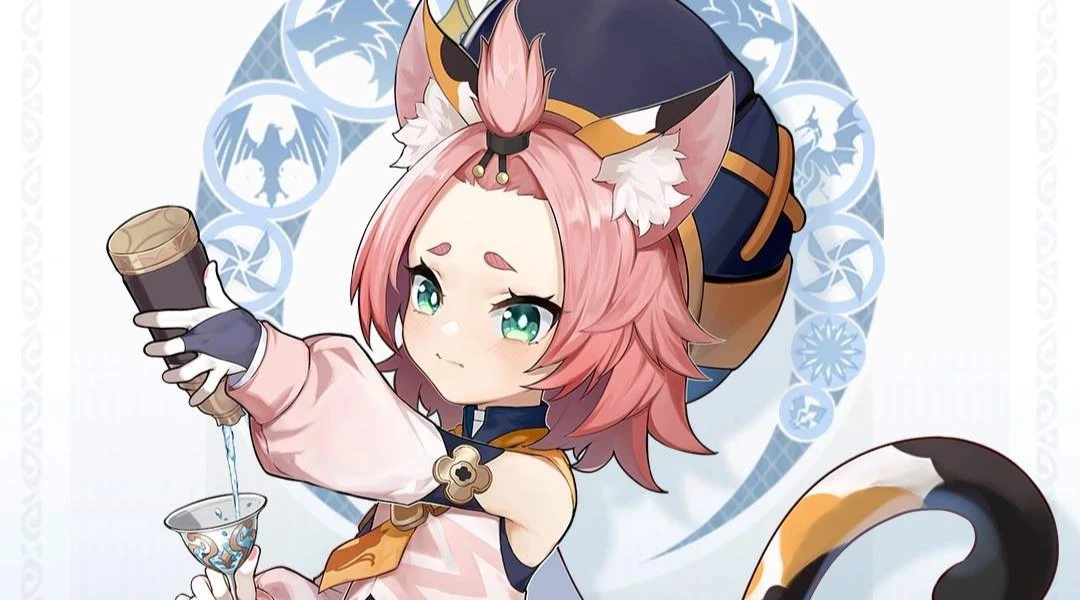
Diona is a 4-star Cryo Bow character in Genshin Impact who provides defensive utility and is a great Cryo battery. Learn about Diona’s best builds, Talent priority, best weapons, best artifacts, and best teams in this quick guide.
Note that the information given may change if new discoveries are made. More extensive testing is in progress.
The full-length guide is available here.
Table of Contents
New Content
 Lyney | Diona can provide a shield for Lyney. She also provides healing but has no significant advantages otherwise. |
 Freminet | Freminet appreciates Diona’s shielding, healing, and battery capabilities. However, she does not contribute much to team damage. |
Infographic
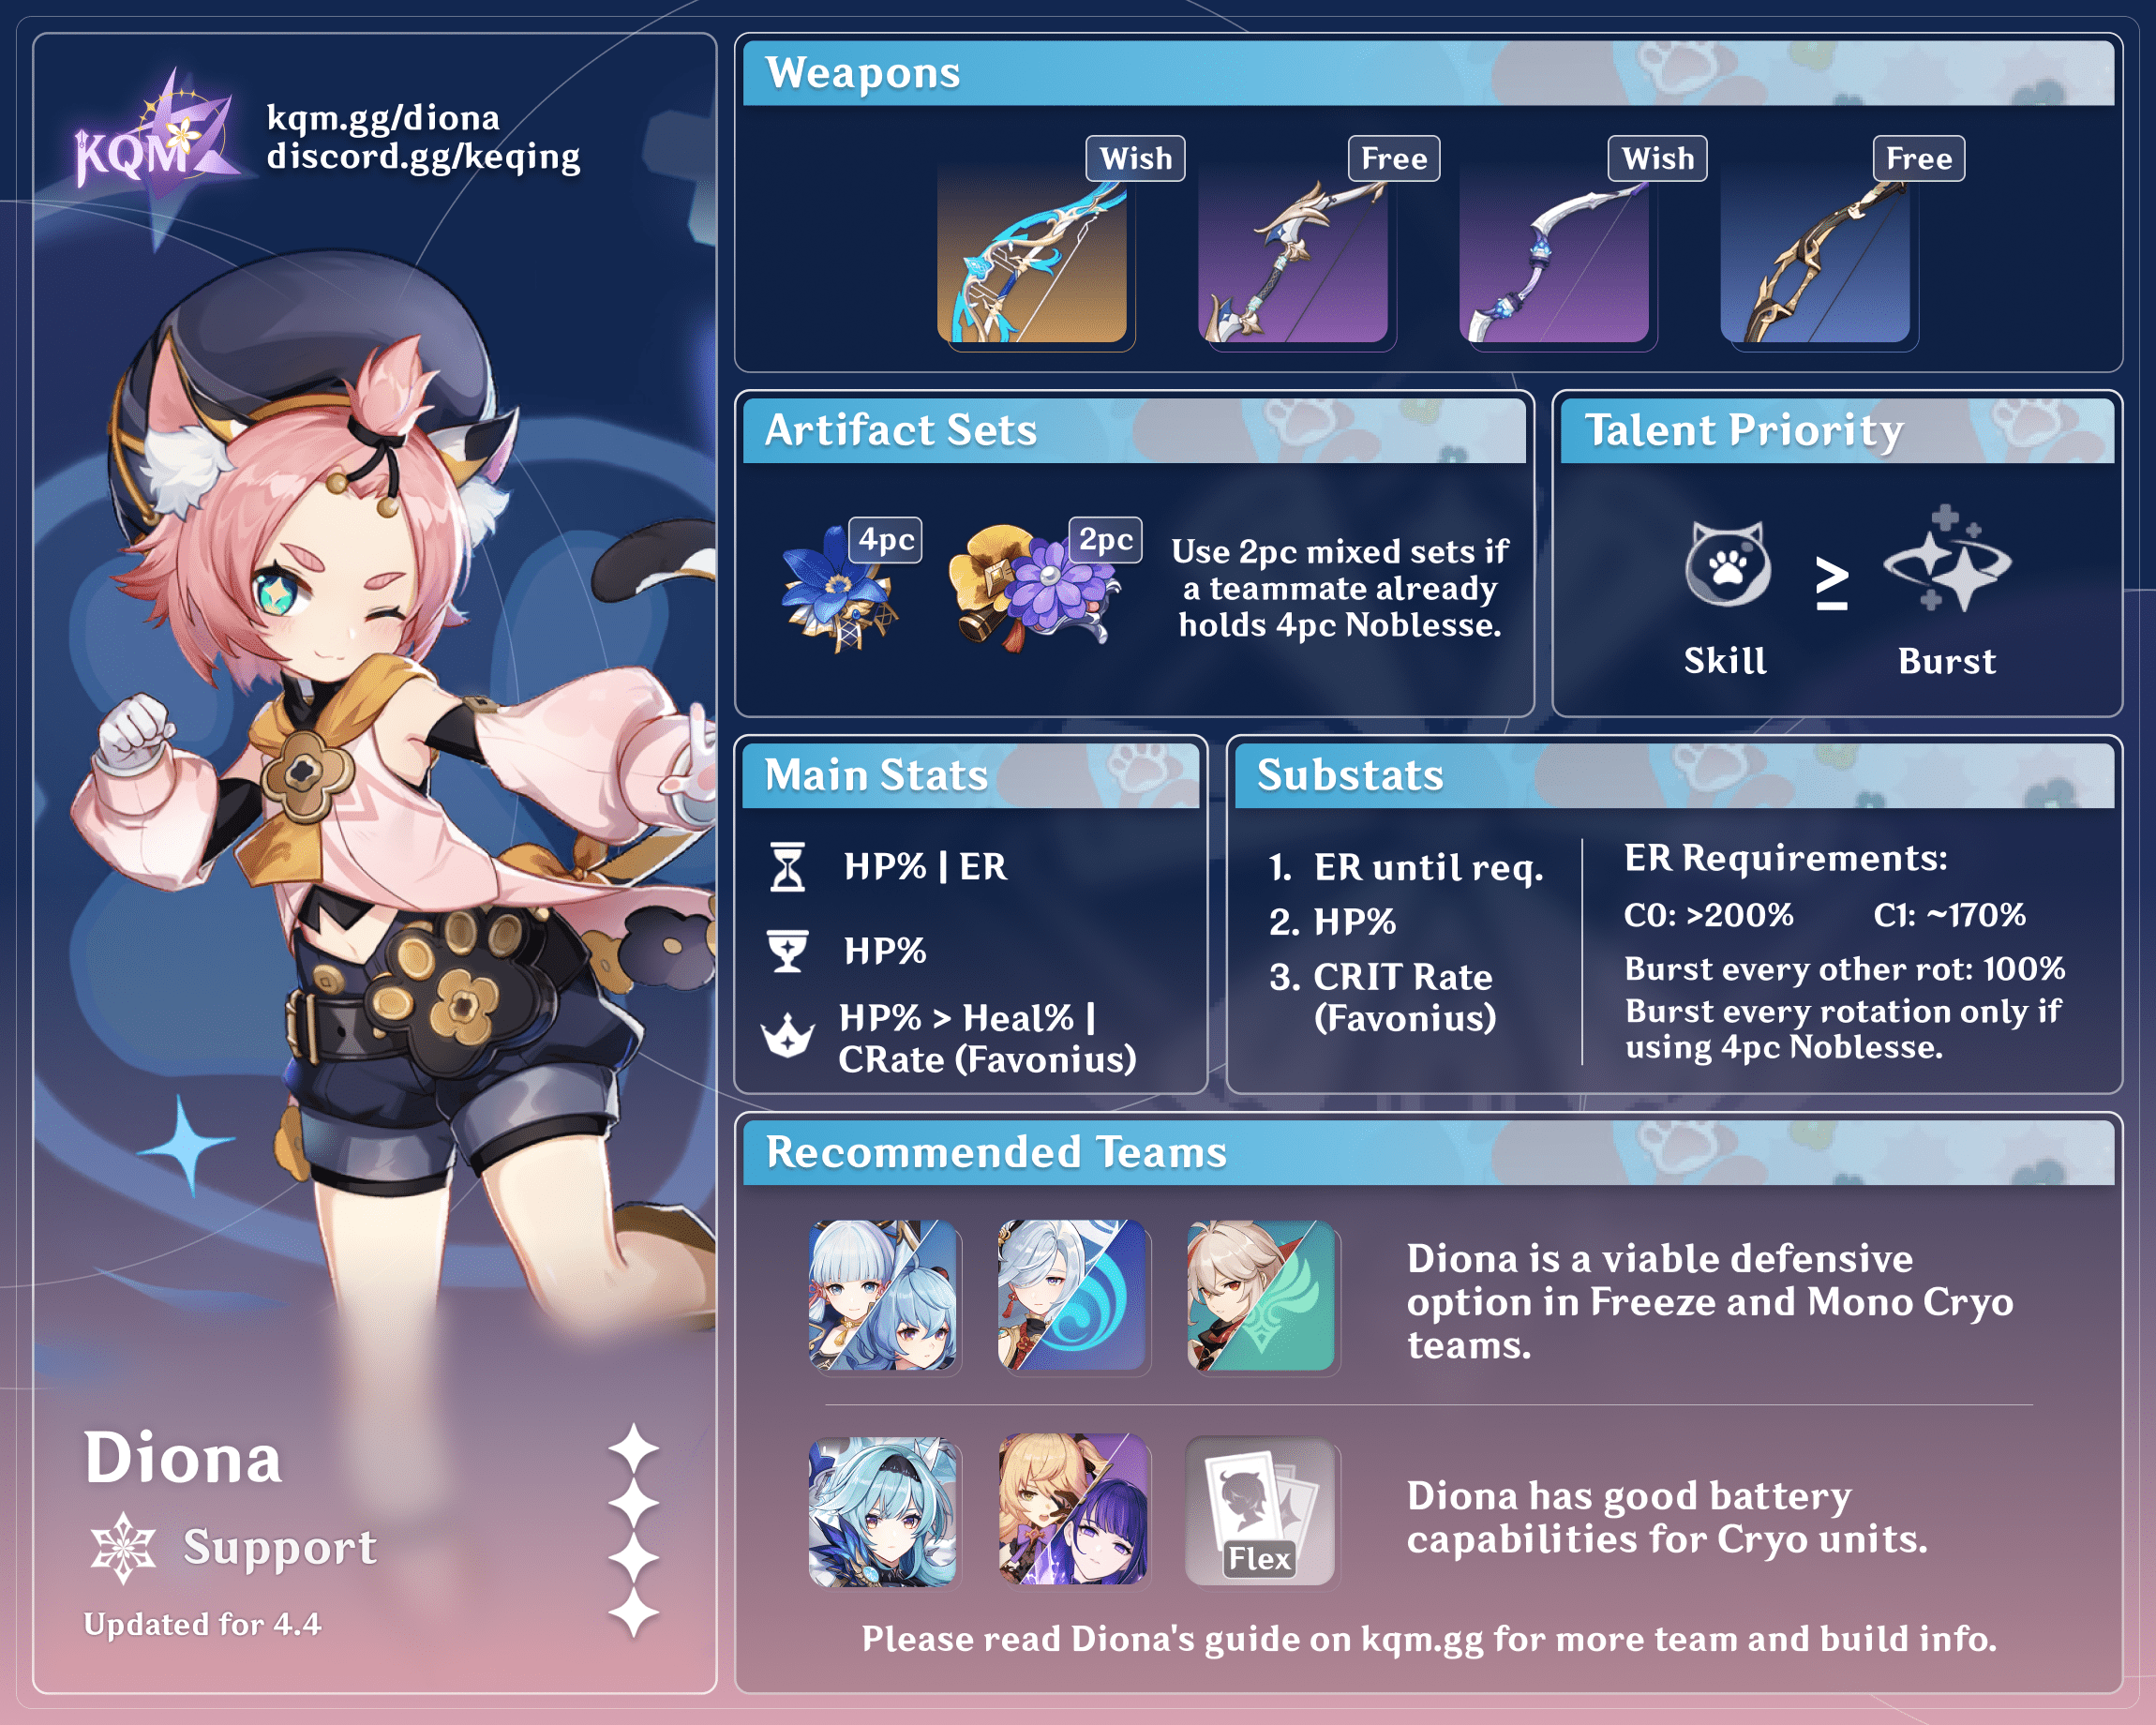
Design: cuppacote
Content: chasing_haze
Character Overview
Playstyles
Support
Due to Diona’s low personal damage, she is best built to maximize her shielding and healing. She is also a good battery for other Cryo characters.
Talents
Level and Talent Priority
Diona appreciates character levels to maximize her HP scalings.
Talent Priority
Skill ≥ Burst
Diona’s Normal Attacks do not contribute to her support role and can be left unleveled.
Priority should be given to her Skill or Burst depending on whether players want to focus on her shielding or healing, respectively.
Talent Overview
 Normal Attack | Kätzlein Style
Talent Description
Normal Attack
Perform up to 5 consecutive shots with a bow.
Charged Attack
Perform a more precise Aimed Shot with increased DMG.
While aiming, biting frost will accumulate on the arrowhead. A fully charged frost arrow will deal Cryo DMG.
Plunging Attack
Fires off a shower of arrows in mid-air before falling and striking the ground, dealing AoE DMG upon impact.
A lackluster set of Normal Attacks that typically go unused.
 Elemental Skill | Icy Paws
Talent Description
Fires an Icy Paw that deals Cryo DMG to opponents and forms a shield on hit.
The shield’s DMG Absorption scales based on Diona’s Max HP, and its duration scales off the number of Icy Paws that hit their target.
Press
Rapidly fires off 2 Icy Paws.
Hold
Dashes back quickly before firing five Icy Paws.
The shield created by a Hold attack will gain a 75% DMG Absorption Bonus.
The shield has a 250% Cryo DMG Absorption Bonus, and will cause your active character to become affected by Cryo at the point of formation for a short duration.
Diona’s Hold Skill is recommended over her Tap Skill since its shield is stronger, lasts longer, and has better particle generation (~4 Cryo Particles). Talent Level 7 is recommended for maximum shield duration.
Note that the Icy Paws from Diona’s Skill only need to explode to generate a shield (e.g., by hitting a wall), but they will not generate particles unless they hit an enemy.
For more detailed information on Diona’s Skill, please see the full Diona guide.
 Elemental Burst | Signature Mix
Talent Description
Tosses out a special cold brew that deals AoE Cryo DMG and creates a Drunken Mist in an AoE.
Drunken Mist
- Deals continuous Cryo DMG to opponents within the AoE.
- Continuously regenerates the HP of characters within the AoE.
The healing from Diona’s Burst is rather mediocre, but it provides plenty of survivability when combined with her Skill’s shield.
Due to her Burst’s slow tick rate (once every 2s) and standard Internal Cooldown (ICD), Diona is not a reliable source of Cryo application. However, this also means that Diona does not interfere much with other reactions.
 Ascension 1 Passive | Cat’s Tail Secret Menu
Talent Description
Characters shielded by Icy Paws have their Movement SPD increased by 10% and their Stamina Consumption decreased by 10%.
A minor increase to quality-of-life. Reduced Stamina consumption can be useful for characters who often use Charged Attacks (e.g., Hu Tao or Keqing), and extra Movement SPD makes it easier to execute the Dragonstrike tech.
 Ascension 4 Passive | Drunkards’ Farce
Talent Description
Opponents who enter the AoE of Signature Mix have 10% decreased ATK for 15s.
An added layer of survivability, but generally negligible.
Constellations
 Constellation 1 | A Lingering Flavor
Regenerates 15 Energy for Diona after the effects of Signature Mix end.
Effectively reduces Diona’s Burst Cost from 80 to 65, lowering her ER requirements.
 Constellation 2 | Shaken, Not Purred
Increases Icy Paws’ DMG by 15%, and increases its shield’s DMG Absorption by 15%.
Additionally, when paws hit their targets, creates a shield for other nearby characters on the field with 50% of the Icy Paws shield’s DMG Absorption for 5s.
Most notable for the extra shield tankiness. Also generates a shield for teammates in Co-Op Mode. In Co-Op, it may be better to use Tap Skill instead of Hold Skill for better shield uptime.
 Constellation 3 | A—Another Round?
Increases the Level of Signature Mix by 3.
Maximum upgrade level is 15.
A simple +3 Talent levels to Diona’s Burst, boosting her healing.
 Constellation 4 | Wine Industry Slayer
Within the radius of Signature Mix, Diona’s charge time for aimed shots is reduced by 60%
A generally insignificant Constellation since support Diona only wants to use her Skill and/or Burst before swapping off.
 Constellation 5 | Double Shot, on the Rocks
Increases the Level of Icy Paws by 3.
Maximum upgrade level is 15.
A simple +3 Talent levels to Diona’s Skill, boosting her shield’s DMG Absorption.
 Constellation 6 | Cat’s Tail Closing Time
Characters within Signature Mix’s radius will gain the following effects based on their HP amounts:
- Increases Incoming Healing Bonus by 30% when HP falls below or is equal to 50%.
- Elemental Mastery increased by 200 when HP is above 50%.
Arguably Diona’s best Constellation. The massive EM boost is quite valuable for reaction-based teams and damage-per-screenshot showcases.
Artifacts
ER Requirements
Diona’s ER requirements greatly vary depending on the team and rotation. Use the Energy Recharge Calculator to determine exact requirements for your team and rotation.
| Burst Every Rotation | Burst Every Other Rotation | |
| C0 | >200% (Not recommended) | ~100% |
| C1+ | ~170% | ~100% |
Without C1, it is not recommended to Burst every rotation, and Diona generally doesn’t need to unless she is using 4pc Noblesse Oblige. An ER weapon with a couple of ER substats is usually enough.
Artifact Stats
 Sands |  Goblet |  Circlet |
| HP% | HP% | HP% / Healing Bonus CRIT Rate (Favonius) |
Substats: ER until requirements > HP% >= CRIT Rate (Favonius) > Flat HP
HP should be prioritized over Healing Bonus since it benefits both Diona’s shielding and healing.
CRIT Rate is a valuable stat if Diona uses Favonius Warbow.
Artifact Sets
 2pc Mixed Sets HP% / ER / Healing Bonus | The most universal option for Diona’s kit, although it lacks any sort of buffs. |
 4pc Noblesse Oblige | Provides a valuable ATK% buff to teammates. Diona will want to Burst every rotation. |
 4pc Blizzard Strayer | Provides CRIT Rate in Freeze or Mono Cryo teams, which helps Diona proc Favonius Warbow’s passive. |
 4pc Maiden Beloved / 4pc Ocean-Hued Clam | Sets to capitalize on Diona’s healing. Diona does not take good advantage of Clam damage, so Maiden Beloved is generally recommended instead. |
 4pc Tenacity of the Millelith | Because Diona does not have the best uptime on this set, it requires very specific rotations and characters to take full advantage of. |
 4pc Instructor | Sacrifices her shield’s DMG Absorption — by virtue of being a 4-star set — for an EM buff. |
 4pc Deepwood Memories | If no one else in your Dendro team can hold it, Diona can. |
Weapons
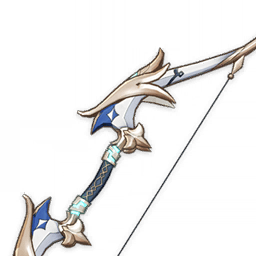 Favonius Warbow | Given for free after defeating Dvalin in the Archon Quest. Provides a healthy amount of ER for Diona and universal clear particles for the team. Its passive requires a CRIT Hit, but this can be alleviated by building CRIT Rate, using 4pc Blizzard Strayer, or aiming at a weak spot. |
 Sacrificial Bow | Sacrificial Bow improves Diona’s Cryo battery capabilites while allowing for high shield uptime. It also provides some ER. Diona is extremely consistent at triggering the passive (>90% at all refinements) thanks to her Skill having multiple hits. Note that depending on your weapon’s Refinement level and rotation length, it may not be possible to proc the passive every rotation. |
 Elegy for the End | A 5-star weapon that provides many strong buffs to the team. It can be difficult to keep uptime on Elegy’s passive. See the full Diona guide for more. |
 Recurve Bow | A 3-star Bow and the only one with an HP% secondary stat. Provides nothing more than stronger shields and heals. |
Teams
This is not a comprehensive list of teams. The inclusion or exclusion of any given team does not necessarily reflect its power level.
Teambuilding
- Generally, Diona is able to slot in any team that appreciates a shielder/healer.
- Diona has high value as a Cryo battery for units such as Eula or Ayaka.
Freeze

Diona’s defensive utility may seem redundant against Freezable enemies, but it is still appreciated for extra comfort. Diona is also a great battery for the Cryo damage dealer.
An Anemo unit is recommended to provide grouping and shred enemy Cryo RES with 4pc Viridescent Venerer.
Example Teams


Mono Cryo

Mono Cryo teams shine against enemies that cannot be Frozen. Shenhe is practically required for her Icy Quill effect, and an Anemo unit holding 4pc Viridescent Venerer is highly recommended to shred enemy Cryo RES.
Example Teams

Eula

Eula often struggles with Energy and greatly appreciates Diona’s battery capabilities. Diona’s defensive utility is also valuable for a hypercarry like Eula. An Electro unit is highly recommended for Superconduct.
Example Teams

Fridge
Fridge is a type of Bloom team that takes advantage of “preserving” the Hydro aura with Cryo. Diona generally slots in best when there is a three-unit Hyperbloom or Burgeon core that desires a defensive unit. C6 Diona’s EM buff is very valuable as well.
Example Teams

General Flex Support

Diona’s shielding, healing, low Cryo application, and low field time allow her to slot into most teams that have an open slot and desire a defensive unit. In some Pyro teams, her Cryo application can occasionally enable a Melt or Vapemelt reaction for additional damage.
Example Teams


Credits
chasing_haze, ultimate.noob, nociii, idkanonymized, polomo, dejaroo, cinders_pear
Team images courtesy of the KQM portrait generator.