A Fischl Guide by KQM
Updated for Version 4.5
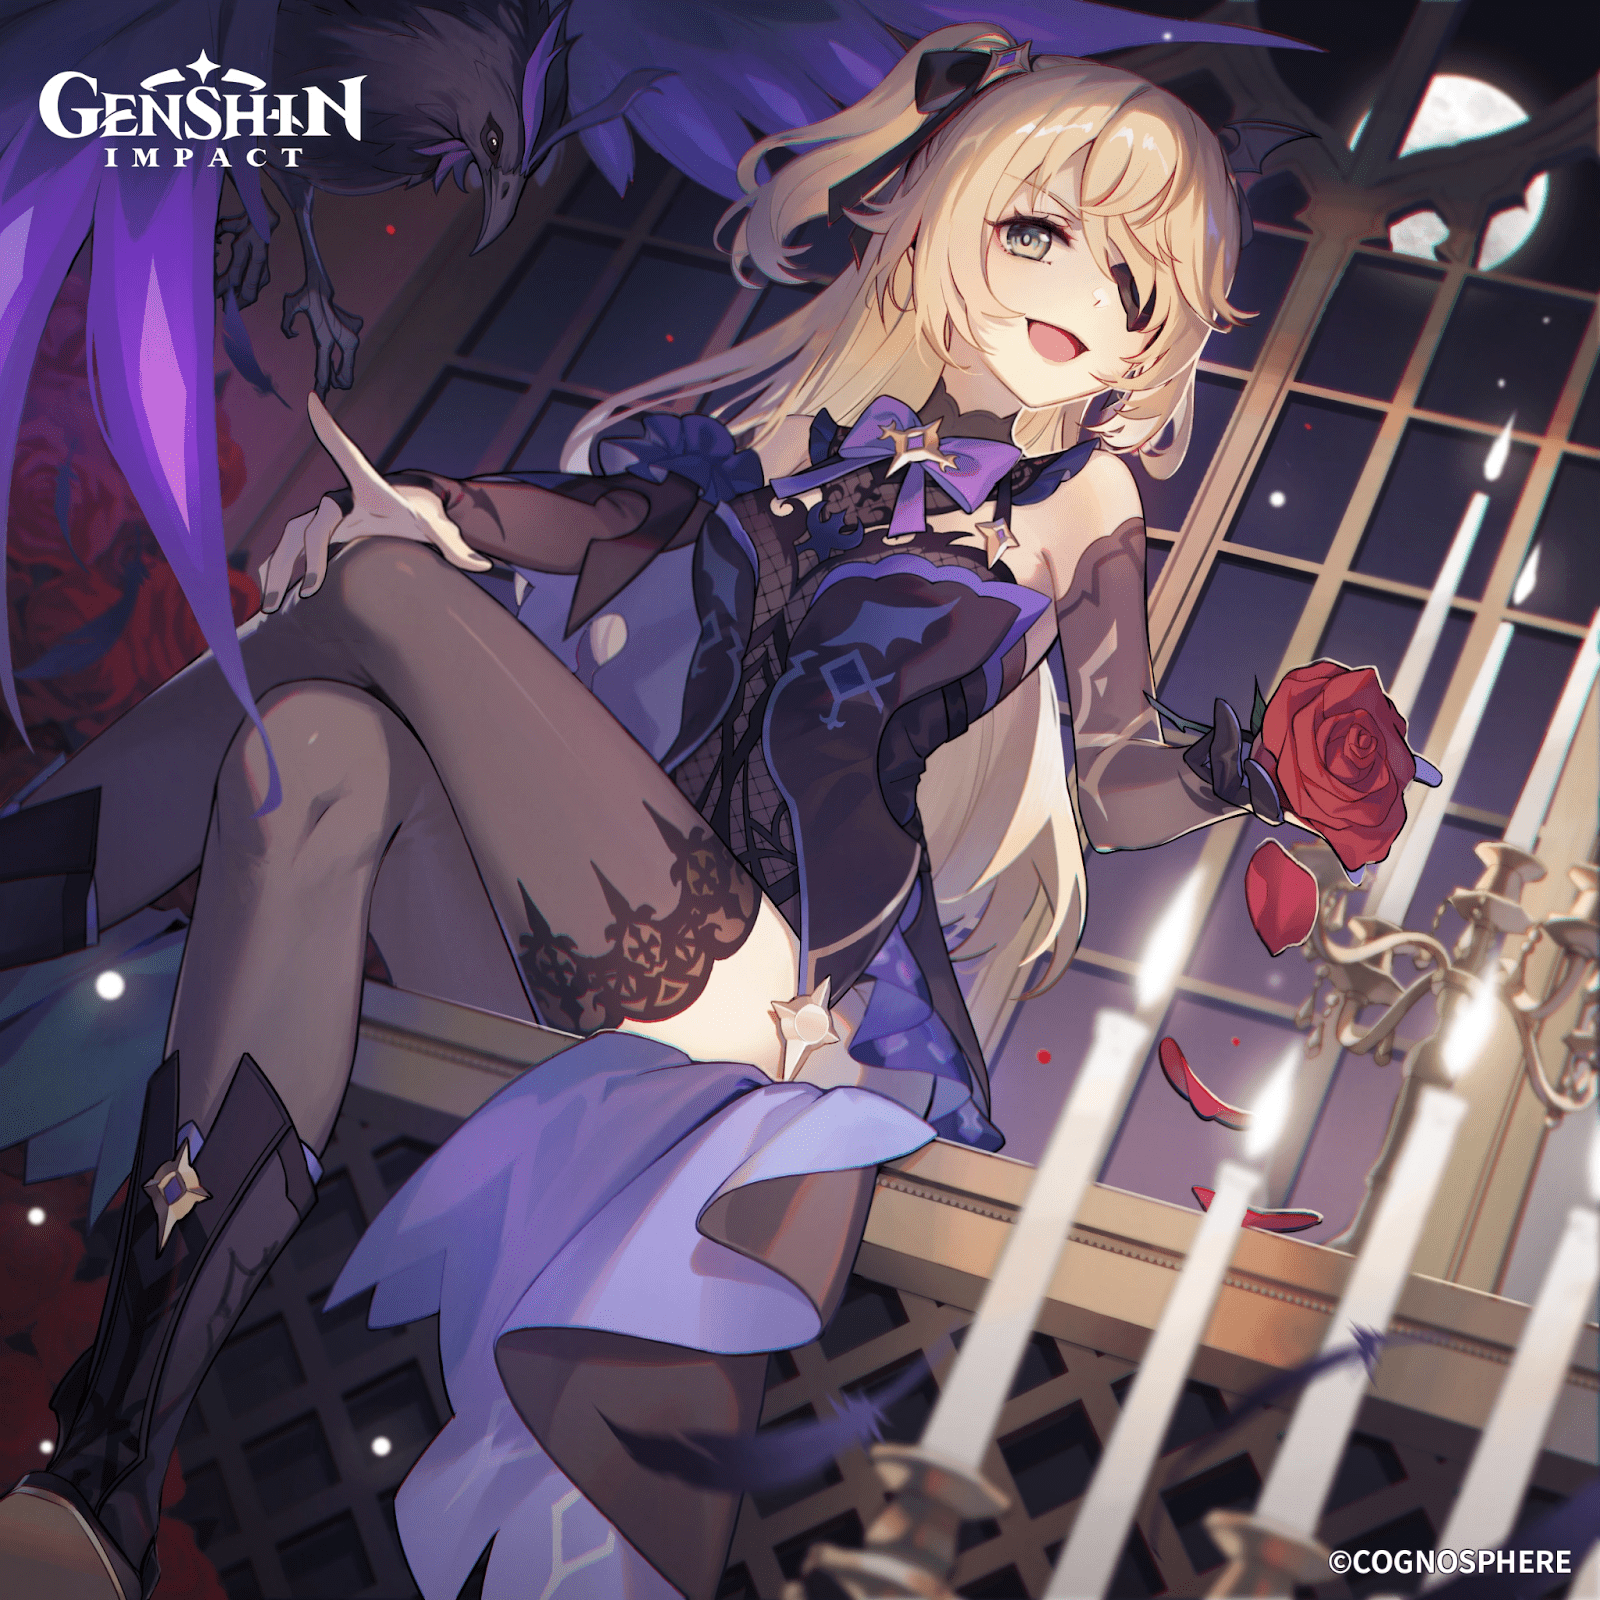
“I, Fischl, Prinzessin der Verurteilung, descend upon this land by the call of fate an— Oh, you are also a traveler from another world? Very well, I grant you permission to travel with me.”
Table of Contents
Introduction
Fischl is a versatile 4-star Electro Bow character with a multitude of uses. The Prinzessin der Verurteilung has cemented herself as one of the game’s premier off-field Electro damage dealers for her strong off-field damage, great battery capabilities, and consistent Electro application. This Fischl guide examines Fischl’s best builds, weapons, artifacts, teams, combos, and more!
Why Play Fischl?
Pros
Cons
- Awkward uptime issues since Fischl's 25s Skill cooldown and 15s Burst cooldown can confuse players and cause Oz to desync with team rotation length
- Lower Electro application without constant A4 procs or her C6
- Difficulty controlling Oz’s targeting in multi-target scenarios without Fischl’s C6
- Competition from other supports that provide buffing or other utilities
- Lack of AoE damage and application after initial casts, making the majority of damage single-target
- Inconsistent Energy generation can make her teammates' exact ER requirements fluctuate
FAQ
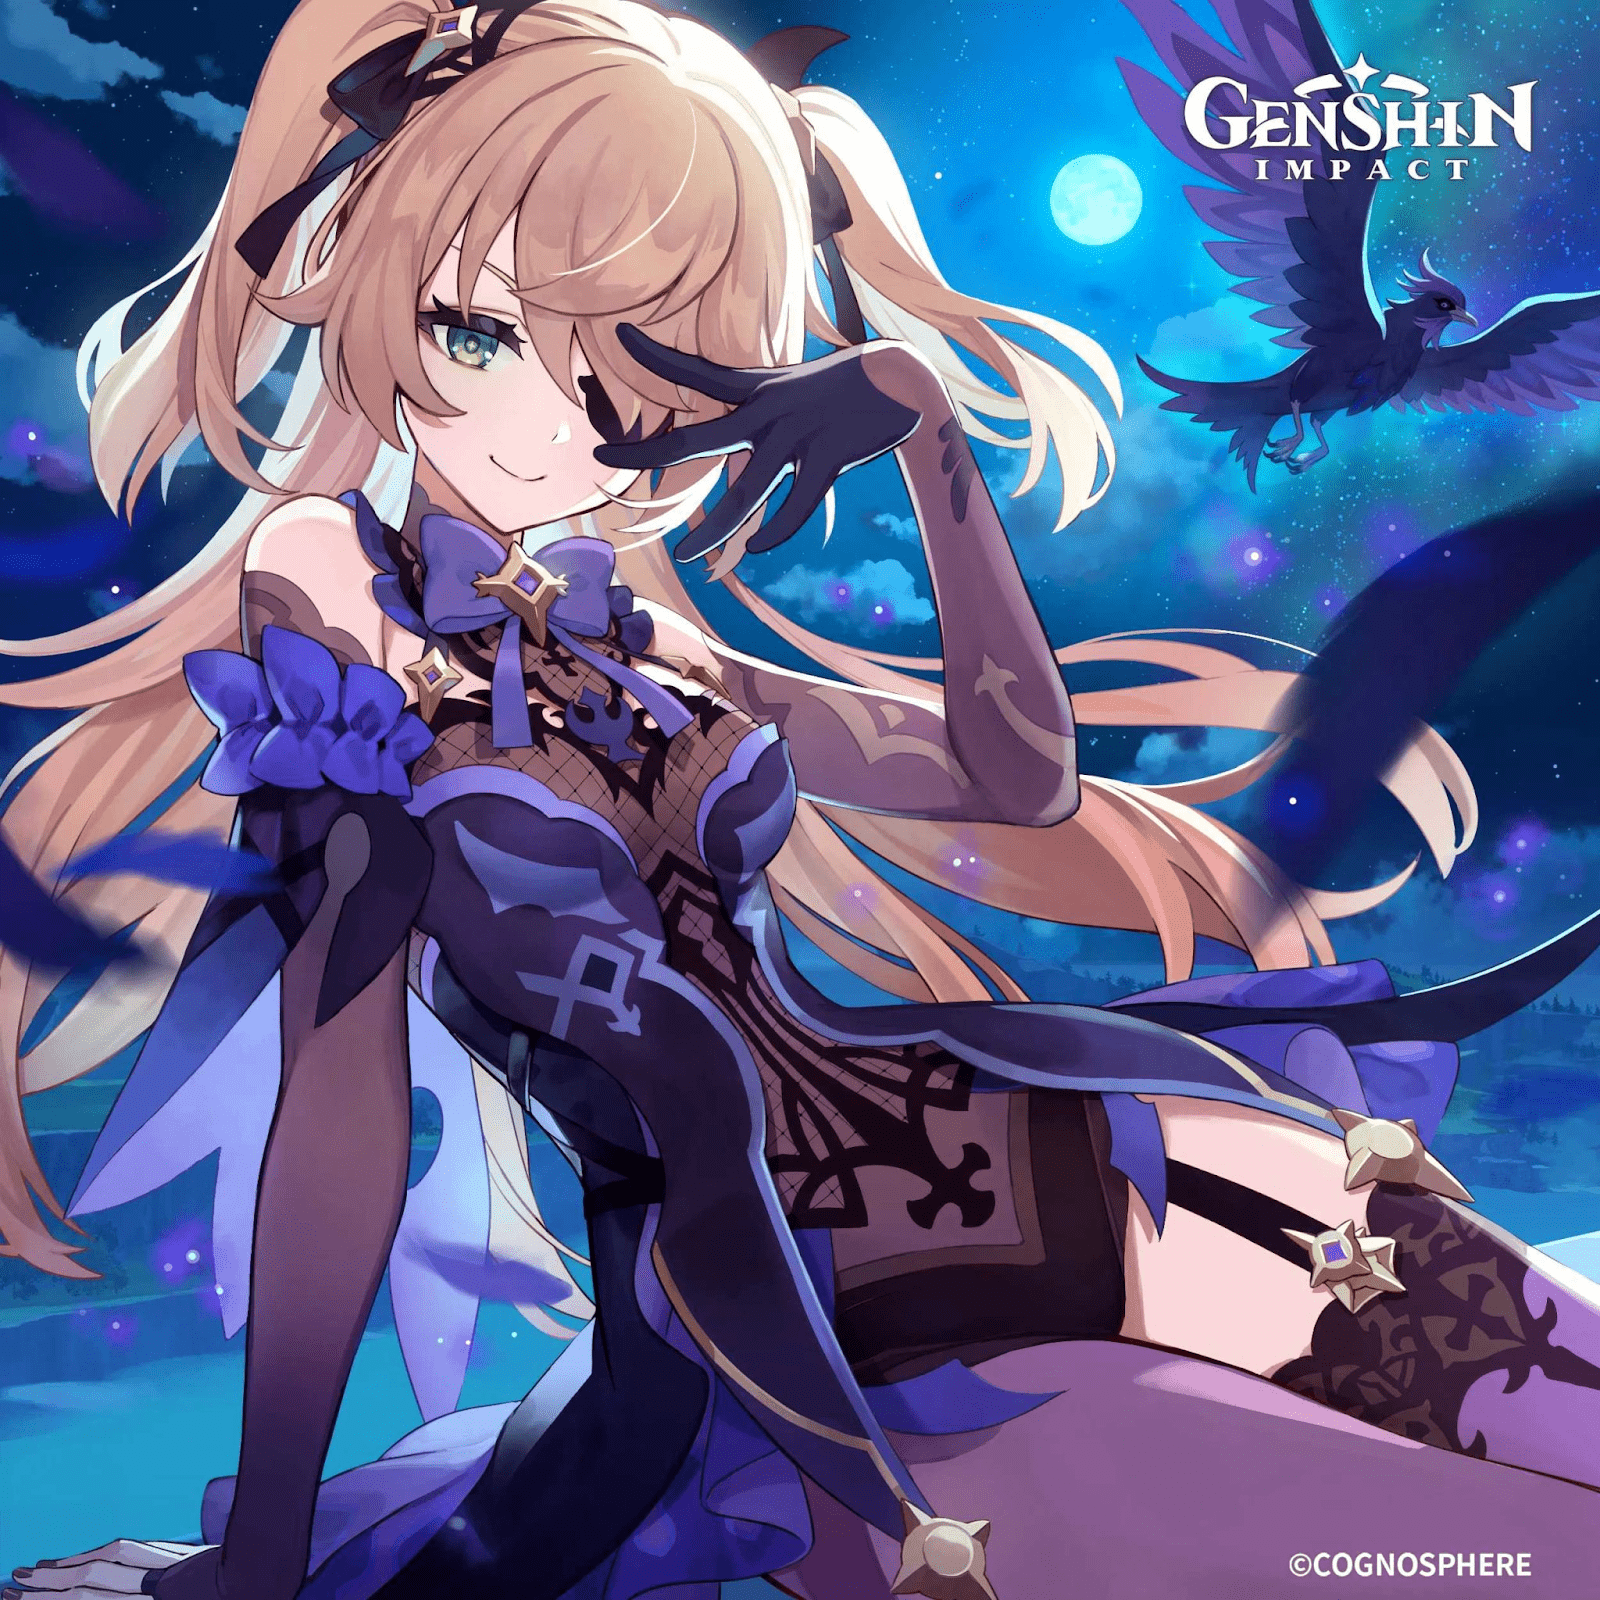
“I, Fischl, have roamed the galaxy and traversed countless worlds. I have learned the fate of ten thousand universes and have had revealed unto me the destiny of every living soul.”
It is a common misconception that Fischl only serves as an off-field DPS. In reality, Fischl does much more than that.
What’s so special about Fischl?
One of Fischl’s greatest benefits is her highly potent Electro application, which allows her teams to consistently trigger Electro Reactions such as Electro-Charged, Aggravate, and Overloaded. If this is confusing, think of how Xingqiu is often used as a Hydro applier to enable the Vaporize reaction. Fischl plays a similar role but with specific nuances.
Another one of Fischl’s benefits is her ability to generate Energy for her team, often referred to as batterying. This reduces the ER requirements of other teammates, which lets them focus more on offensive stats.
If a team does not require Fischl’s combination of Electro application and Energy generation, other units may bring more value to the team, especially for multi-target scenarios. However, her strong off-field damage is still valuable enough to keep in consideration.
Do I need Fischl’s C6? How good is it?
Fischl’s C6 is very good, since it increases her damage, Electro application rate, Energy generation, and quality of life. However, a common misconception is that she requires C6 to be good. This is incorrect — even at C0, she still functions well as an Electro DPS, enabler, and battery. For more information, please check the Constellations section.
Should I build Fischl with any Energy Recharge?
Fischl’s Burst is critical to maximizing Oz’s uptime. While Fischl can work in many teams with little to no investment into Energy Recharge, you should check that you have enough ER% to maximize Oz’s potential. Furthermore, Fischl’s own Energy generation is RNG-dependent: it is possible to generate less particles than expected on average, which would leave her and her team without enough Energy. Use the Energy Recharge Calculator or gcsim to determine more precise ER requirements for Fischl and her team.
Should I use an ATK% or Electro DMG% Goblet?
In almost all scenarios, Electro DMG% Goblets are better than ATK% Goblets. This difference is especially pronounced with Aggravate, a reaction that scales much better with DMG Bonus than ATK.
It is only in very specific scenarios that involve both an abundance of DMG% buffs (such as a combination of 4pc Golden Troupe, R5 Stringless, Kazuha’s A4 Passive, Furina’s Burst buff, and R5 Hakushin Ring) and a lack of external ATK buffs that ATK% Goblets win out. Even then, the improvement over an Electro DMG% Goblet is minimal.
Glossary
TL;DR
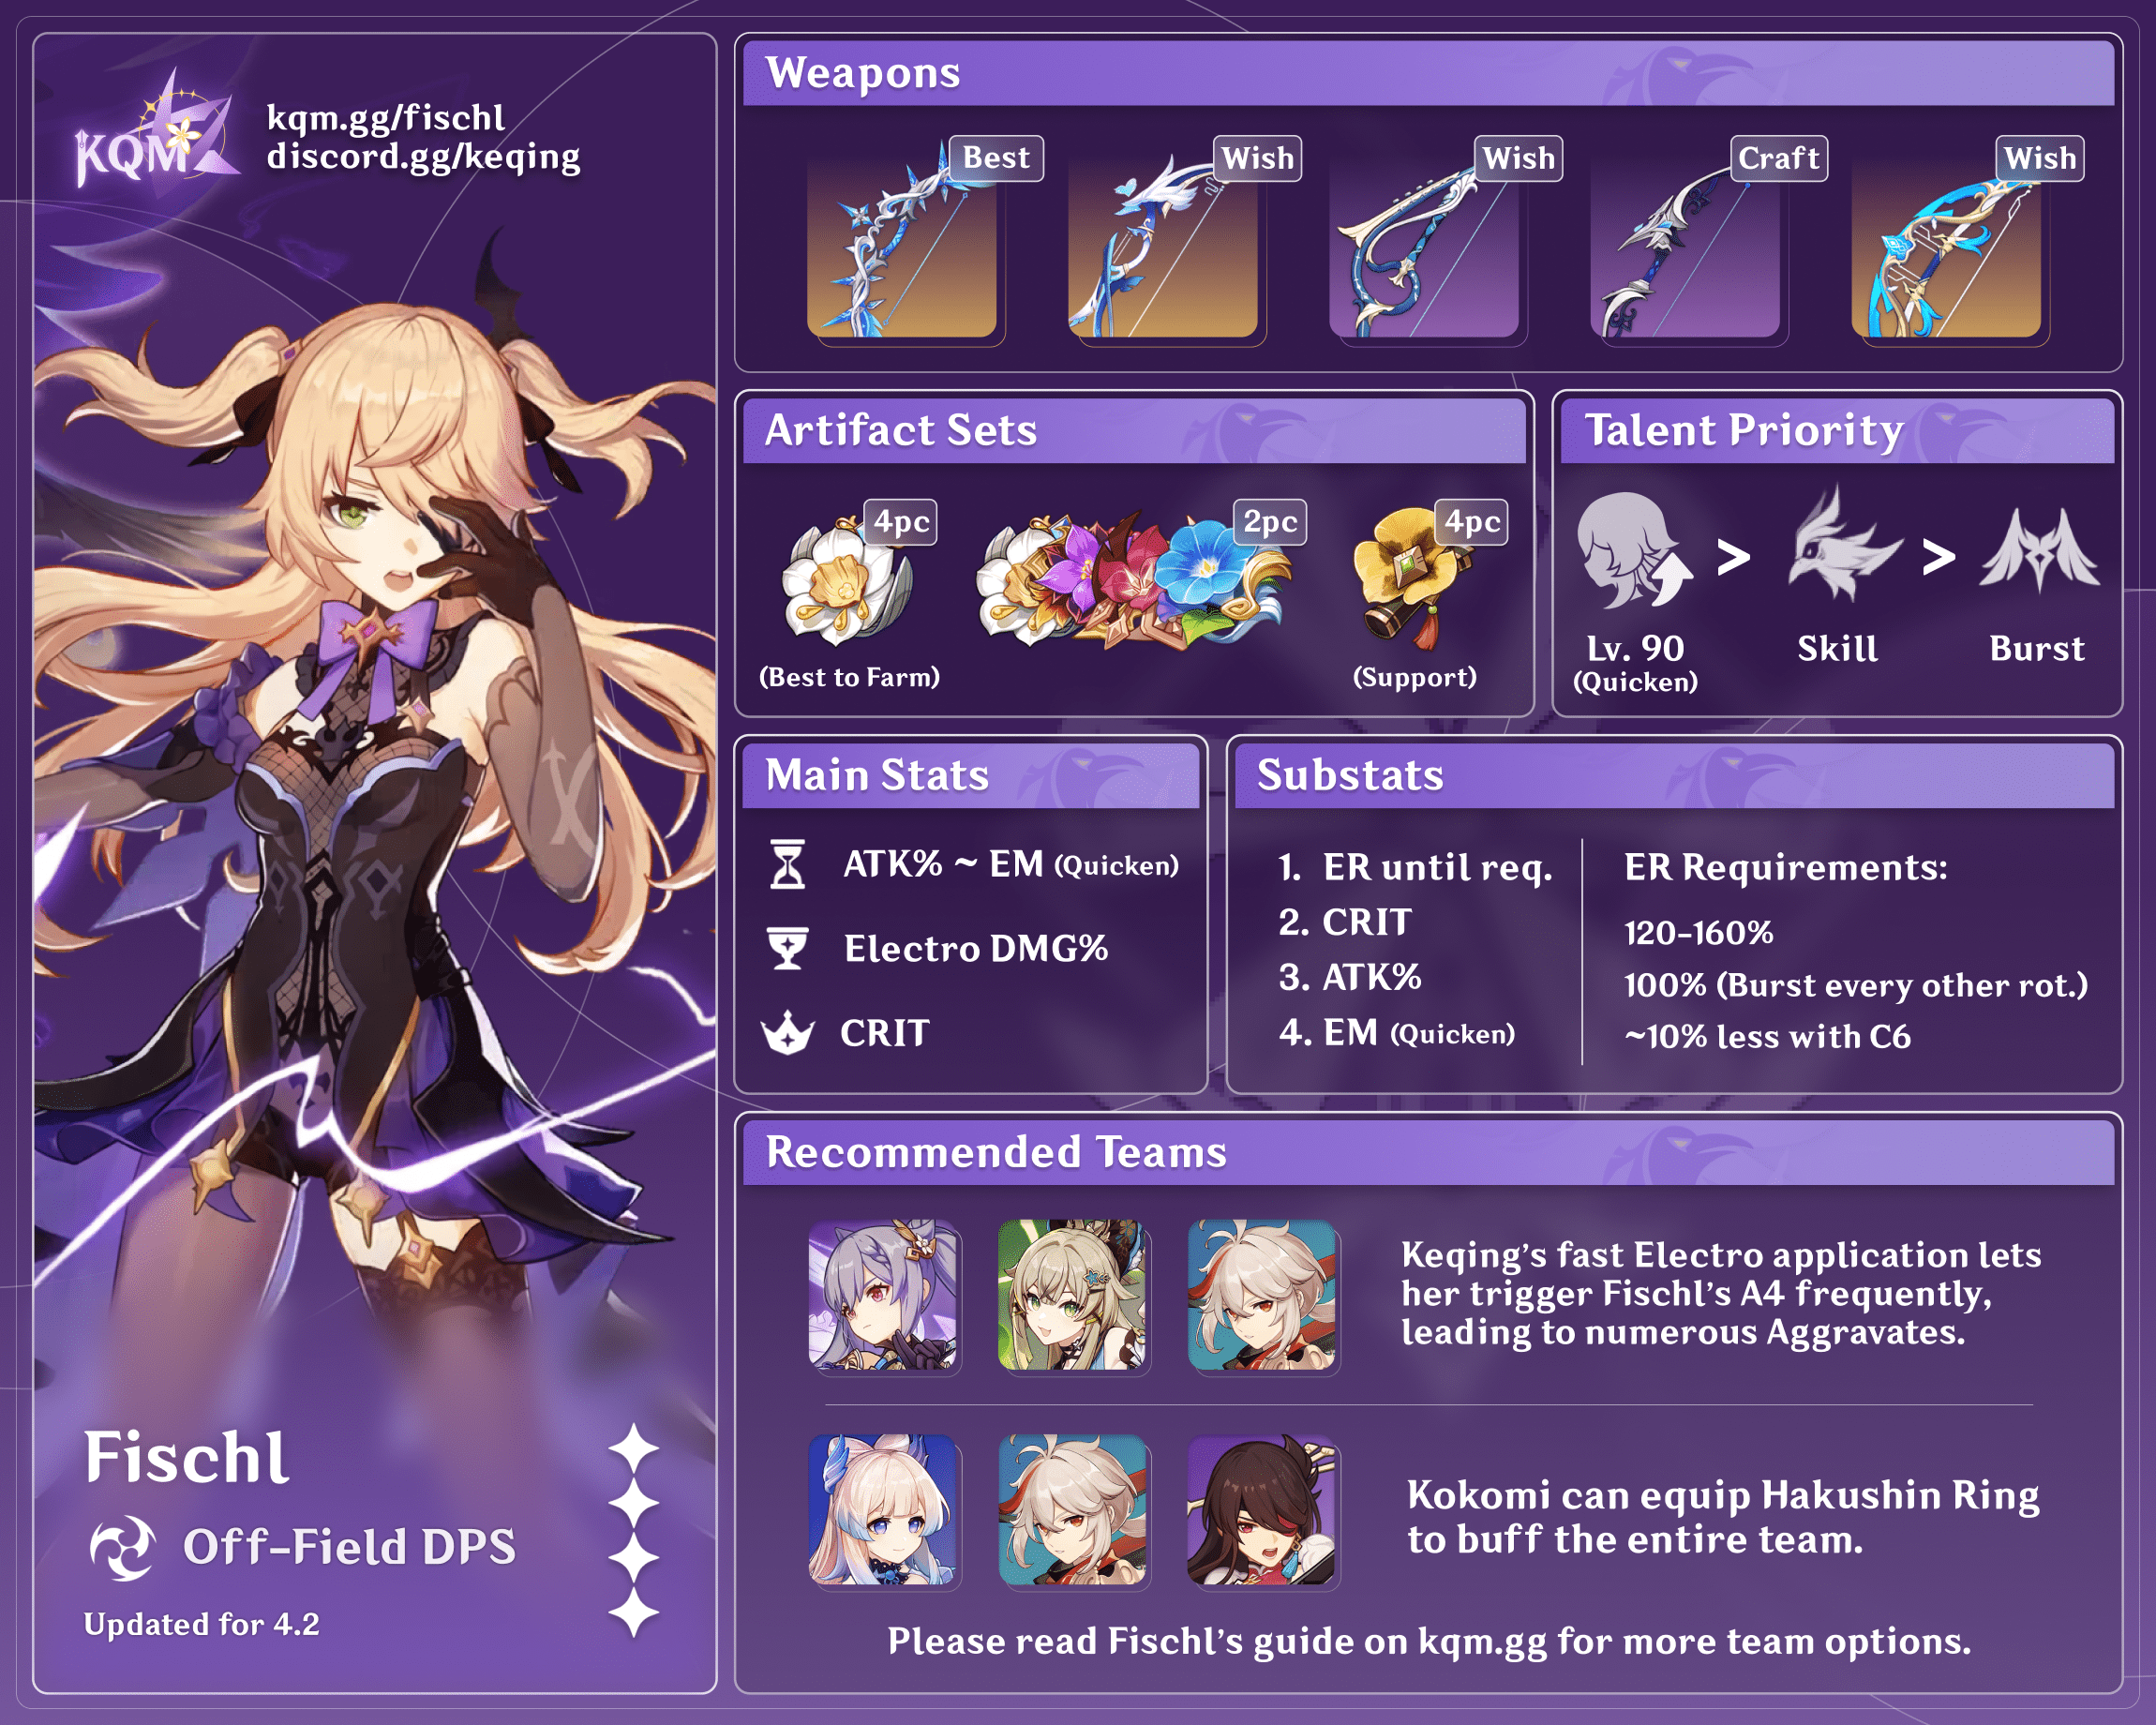
Design: icedsquid
Content: nikatosaurus
Character Overview
Playstyles
Off-Field Fischl
Off-field Fischl centers around Oz and his ability to deal high off-field damage while contributing Energy Electro application. As an off-field DPS, Fischl only swaps in to summon or refresh Oz with her Skill and Burst.
On-Field Fischl
On-field Fischl emphasizes the use of her Normal Attacks. There are three primary variations of Fischl’s on-field playstyle: Oz-oriented Electro, Oz-oriented Physical, and C1-oriented Physical. In any variation, Fischl benefits greatly from teammates with strong off-field damage or support capabilities.
This playstyle is only briefly covered in this guide. Stay tuned for future updates for more information on Fischl’s on-field playstyle!
Talents
Constellations
Fischl provides a lot of utility, which includes her damage, particle generation, and Electro application. While Fischl does see a significant damage increase from C0 to C6, she is already a strong unit with a complete kit at C0. Her best Constellations are her C3 and C6, which improve her personal damage and Electro application.
Assumptions
Constellation increases are for off-field Fischl. The Constellation values are the approximate ranges of team DPS increases from three gcsim Fischl teams:
- Fischl — Raiden — Kazuha — Bennett
- Fischl — Keqing — Kazuha — Baizhu
- Fischl — Beidou — Kazuha — Kokomi (2 target)
The exact damage increase depends on Fischl’s build, her team, the enemy scenario, and her playstyle. For more information on the calculations, simulations, and Fischl’s personal DPS increases, please check the Fischl Mastersheet.
Cells filled with a dash (-) indicate that the damage increase is negligible.
 Constellation 1 | Gaze of the Deep
Even when Oz is not present in combat, he can still watch over Fischl through his raven eyes. When Fischl performs a Normal Attack against an opponent, Oz fires a coordinated attack, dealing DMG equal to 22% of Fischl's ATK.
Fischl’s C1 is only relevant to on-field Fischl playstyles. There are two conditions to trigger her C1:
- Oz must not be currently deployed.
- The enemy attacked is within the range of Fischl’s Normal Attack auto-targeting.
When both these conditions are met, an orb fires at the same enemy Fischl attacks. This projectile is separate from her own Normal Attack.
Example of triggering Fischl’s C1 by itzsomebody
Fischl’s C1 scales with Normal Attack DMG, so it can benefit from Yun Jin’s Flying Cloud Flag Formation buff. This has made Fischl’s C1-oriented on-field playstyle popular among on-field Fischl players.
As a point of technicality, Fischl’s C1 triggers on the startup frames of her Normal Attacks. This means you can trigger her C1 without the arrow itself coming out.
Example of triggering C1 without Normal Attack coming out by itzsomebody
 Constellation 2 | Devourer of All Sins
When Nightrider is used, it deals an additional 200% ATK as DMG, and its AoE is increased by 50%.
Fischl’s C2 increases the Talent multiplier for Oz’s summoning damage by 200% (additively). This does not, however, affect Oz’s usual turret damage. Fischl’s C2 boosts her damage primarily in multi-target scenarios.
Team DPS Increase From C0: 0.3–1.8%
 Constellation 3 | Wings of Nightmare
Increases the Level of Nightrider by 3.
Maximum upgrade level is 15.
Fischl’s C3 is the second-best constellation for off-field and Electro-oriented on-field playstyles, since Oz makes up the majority of her damage for these builds.
On-field Physical and C1-oriented playstyles do not benefit as much from this Constellation due to Oz’s limited uptime.
Team DPS Increase From Previous Constellation: 1.9–3.4%
Team DPS Increase From C0: 2.9–3.7%
 Constellation 4 | Her Pilgrimage of Bleak
When Midnight Phantasmagoria is used, it deals 222% of ATK as Electro DMG to surrounding opponents.
When the skill duration ends, Fischl regenerates 20% of her HP.
Fischl’s C4 is a small damage increase, except in high-density multi-target scenarios. It notably increases Fischl’s survivability by healing her when her Burst ends, even if she swap-cancels. The healing is particularly useful in teams without a dedicated healer.
The damage counts as a separate attack from her Burst, but it is still considered Burst DMG.
Unfortunately, Fischl’s C4 only deals damage to enemies within a small radius on cast. If you were to cast Fischl’s Burst outside of the C4 range and fly towards an enemy, you would not trigger the C4 effect despite resolving Fischl’s usual Burst damage triggers.
[Advanced] C4 and Elemental Gauge Theory
Fischl’s C4 damage triggers before her Burst damage. This applies 2U Electro to enemies as opposed to 1U without her C4, which enables more reactions depending on the team.
Team DPS Increase From Previous Constellation: 0.8–1.8%
Team DPS Increase From C0: 3.7–5.6%
 Constellation 5 | Against the Fleeing Light
Increases the Level of Midnight Phantasmagoria by 3.
Maximum upgrade level is 15.
Fischl’s C5 is not impactful to her overall damage, with the exception of high-density multi-target scenarios. This Constellation does not affect C4 damage.
Team DPS Increase From Previous Constellation: 0.0–0.5%
Team DPS Increase From C0: 3.9–6.0%
 Constellation 6 | Evernight Raven
Extends the duration of Oz's presence on the field by 2s. Additionally, Oz performs coordinated attacks with your active character when present, dealing 30% of Fischl's ATK as Electro DMG.
Fischl’s best Constellation, her C6 accomplishes the following:
- It boosts her damage due to Oz’s increased uptime.
- It increases her rate of Electro application, since Oz and her C6 attacks share ICD.
- It bolsters her particle generation.
- It improves Oz’s targeting (as described in the Oz section below).
Fischl’s C6 scales with the same stats as Oz, which makes buff snapshotting even more powerful.
There are a few conditions to trigger Fischl’s C6:
- Oz must be currently deployed on-field.
- The enemy targeted by the active character’s Normal Attacks must be within the C6 targeting range (slightly larger than the range used for Oz’s usual attacks).
- The enemy targeted by the active character must be within the auto-targeting range of the character’s Normal Attacks.
As a point of technicality, Fischl’s C6 triggers on the startup frames of the active character’s Normal Attacks. Additionally, it only triggers once for multi-hit attacks. For instance, Zhongli’s fifth attack in his Normal Attack string (the “Spear Kick”) deals damage four times, but it only triggers Fischl’s C6 once.
Since Fischl’s C6 triggers on the animation of the active character’s Normal Attacks, it also works for characters like Raiden in her Burst state. Unfortunately, it does not trigger during Dehya’s Burst state, since her attacks do not count as Normal Attack animations.
Team DPS Increase From Previous Constellation: 5.8–29.2%
Team DPS Increase From C0: 11.1–34.2%
ICD, EGT, and DMG Type
Below is a convenient table for identifying the Elemental Gauges, ICDs, and DMG types for each of Fischl’s attacks. If you are unfamiliar with the concepts of Elemental Gauges and ICD, you can visit the KQM TCL pages on Elemental Gauge Theory and ICD.
| DMG Type | Gauge | ICD | ICD Shared with | |
| Normal Attacks | Normal Attack DMG | N/A | N/A | N/A |
| Aimed Shot | Charged Attack DMG | N/A | N/A | N/A |
| Fully-Charged Aimed Shot | Charged Attack DMG | 1U | None | None |
| Oz Summon | Skill DMG | 1U | None | None |
| Oz Attacks | Skill DMG | 1U | 4 hits/5s | C6 |
| Burst | Burst DMG | 1U | 4 hits/5s | C4 |
| A1 | Charged Attack DMG | 1U | None | None |
| A4 | Skill DMG | 1U | None* | None |
| C1 | Normal Attack DMG | N/A | N/A | N/A |
| C4 | Burst DMG | 2U | 4 hits/5s | Burst |
| C6 Triggers | Skill DMG | 1U | 4 hits/5s | Oz Attacks |
*Fischl's A4 has a 0.5s trigger cooldown.
Mechanics
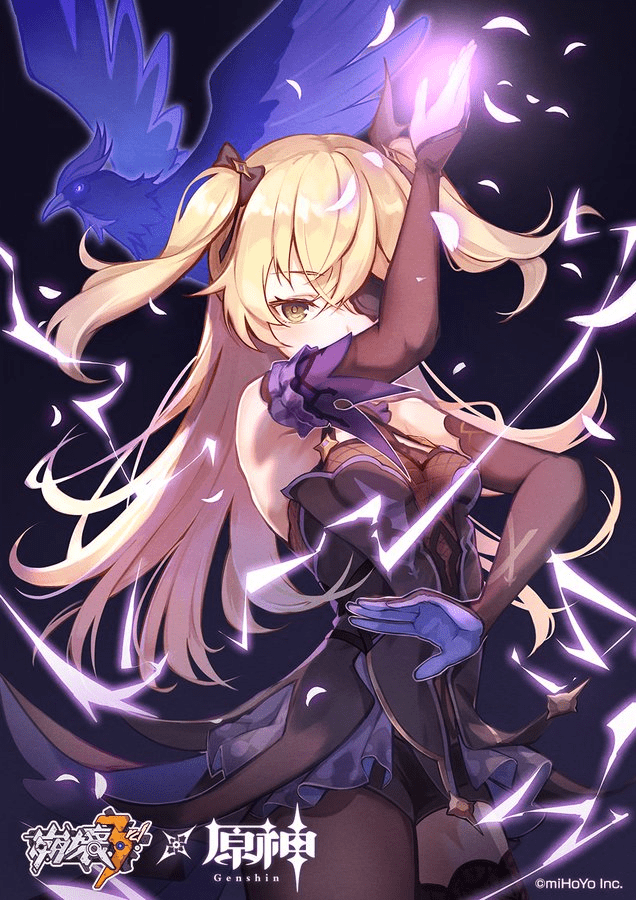
“Oz's full name is Ozvaldo von Hrafnavins. Where I hail from, he holds dominion over star and sky across three universes, and the souls of the mighty, fallen in battle, rest in the shadow of his wings.”
Oz
Oz is an integral part of Fischl’s kit: he is the source of Fischl’s particle generation and represents a significant portion of her damage even when Fischl is built as a Physical damage dealer. Oz’s uptime is also a requirement to trigger Fischl’s A4 Passive, which allows her to become an effective Electro enabler and high damage dealer in teams that take advantage of her kit.
Deploying Oz and Snapshotting
There are two ways to deploy Oz: Fischl’s Elemental Skill or Elemental Burst.
When summoned through Fischl’s Elemental Skill, Oz snapshots on cast. Oz will also re-snapshot stats when resummoned by recasting Fischl’s Elemental Skill.
When summoned through Fischl’s Elemental Burst, Oz snapshots when Fischl leaves Oz’s form (either by letting it naturally expire or forcefully ending it via swapping to another character). As such, it is important to deploy Oz within an area where buffs may be applied onto him (such as within Bennett’s Burst).
Note that Additive and Transformative Reactions do not snapshot EM and their damage is calculated using Fischl's current EM instead.
Oz and Range
Fischl’s Talents have different ranges depending on the type of attack and the character used to activate them.
- Oz has an attack range of 11m (~4.3 Abyss tiles) in a sphere around him.
- Fischl’s A4 has a longer range of 15m (~5.9 Abyss tiles) and is affected by the attack range of the trigger character. Thus, Bow characters are better at activating Fischl’s A4.
A4 Range
Fischl’s A4 range is not completely understood. The current understanding is that it is centered around the active character rather than Oz. When the character’s attacks trigger an Electro reaction outside of said range, Fischl’s A4 fails to trigger. The following properties are also known:
- The range is based on the range of the character’s attacks and is generally larger for attacks with larger auto-targeting ranges.
- Abilities such as Beidou’s Burst or Oz affect the range radius centered around the player.
This is described in slightly more detail in the corresponding entry in the KQM Theorycrafting Library (TCL).
Oz and Geo Constructs
Oz’s attacks (from C1, C6, and his turret attacks) can be physically obstructed by certain Geo constructs, in particular Geo Traveler’s boulder and Zhongli’s pillar.
Zhongli’s Stone Stele blocking Oz’s attacks by itzsomebody
Oz’s Targeting Mechanics
Oz’s targeting is divided into two categories: manual targeting and auto-targeting.
Manual Targeting
Manual targeting influenced by the player is significantly less technical and complicated compared to how Oz determines to auto-target enemies. The two known ways of influencing Oz’s targeting manually are via Fischl’s A1 and C6.
- Fischl’s C6 targets the enemy the player is attacking and causes Oz to change targets to said enemy. It is a huge QoL improvement that allows the player to attack specific enemies on demand.
- Fischl’s A1 targets the enemy closest to the player and causes Oz to change targets to said enemy. Given that this can be difficult to control and comes with additional downsides, it is not recommended to rely on this part of Fischl’s kit.
A4 Targeting
Fischl's A4 Talent targets the entity closest to the active character, not necessarily the enemy on whom the Electro reaction was triggered. Hyperbloom presents an issue for A4 targeting, since there is a possibility for the passive to target Dendro Cores if they are closer than enemies. Check out this Genshin Wiki article for details.
Particle Generation
Fischl’s particle generation is defined as a turret — that is, she generates particles over time rather than instantly. Oz has a 67% chance of generating one Electro Particle per attack, resulting in an expected 0.67 particles per second.
Note that Fischl can generate less Energy than expected on average due to RNG. For this reason, it is helpful to build more Energy Recharge than what Energy Recharge calculators estimate, or to use the “safe mode” option on the calculator.
Electro Reactions
Fischl provides a high, sustained rate of Electro application and can enable and trigger many Electro reactions. Elemental Reactions are key to Fischl’s role in a majority of her teams. Understanding the role Elemental Reactions play is key to teambuilding with Fischl.
For more in-depth information about reactions, the KQM Theorycrafting Library is an excellent place to learn about their intricacies.
For more details on teams, check out the Teams Section.
Superconduct
Superconduct is triggered by applying Electro on a Cryo aura or vice versa. It is the simplest of the Electro reactions because it is used more for its secondary effect than its damage. It reduces enemy Physical RES by 40% for 12s, which is appreciated for Physical DPS units like Eula and Freminet (as well as on-field Physical Fischl). Fischl acts as a good off-field Electro applier to sustain Superconduct uptime.
Electro-Charged
Electro-Charged is a very interesting reaction as it results in simultaneous Electro and Hydro auras. Electro-Charged ticks every second and consumes a bit of Hydro and Electro aura every time it ticks. You can read more about it here.
Electro-Charged should usually be treated as coincidental extra damage and free particles; building EM on Fischl or other characters is not advised in Electro-Charged teams. However, Electro-Charged damage is non-negligible when triggered by units building full EM such as Anemo units.
Electro-Charged damage ticks are determined by the last character to apply Hydro or Electro before the next tick. In addition, when triggering Electro-Charged on enemies already affected by it, effects that are triggered on-reaction will also be triggered, notably Fischl’s A4.
Overloaded
Overloaded is a Transformative Reaction that deals high damage and knocks back enemies. Only one instance of Overloaded damage can be taken by an enemy every 0.5s. In practice, this means Overloaded deals the same amount of damage to one enemy in single-target scenarios as in multi-target scenarios, called linear AoE. Anemo characters can trigger Overloaded through Swirls or Elemental Absorption, using their high EM to deal large amounts of damage; however, additional setups to ensure Pyro Absorption are required.
It is possible to trigger both Vaporize and Overloaded with a single instance of Pyro application to an Electro-Charged aura. This is referred to as Overvape and has some unique properties:
- Overvape deals one instance of Overloaded and one instance of Vaporize.
- Pyro consumes the Electro aura first to trigger Overloaded, then the remaining Pyro consumes the Hydro aura to trigger Vaporize.
Excessive Electro application (2U) from Fischl or an Anemo may cause issues with triggering Vaporize due to aura removal. Click this Genshin Wiki article to access more information and learn about Simultaneous Reaction Priority.
Pyro DPS units whose damage is largely based on Vaporize (e.g., Hu Tao) are optimally built with significant amounts of EM, so Overloaded triggers can add a significant amount of damage to their teams and even encourage them to build more EM.
Note that while Overloaded has high damage potential, the reaction can knock light enemies away, forcing players to run after them. As such, Overloaded is best utilized if against enemies with great poise or if running an Anemo unit with good crowd control.
Swirl
Swirling Electro with the 4pc Viridescent Venerer significantly increases Fischl’s and other Electro teammates’ damage. Electro Swirls are notable for a few reasons:
- Swirl applies a higher amount of its absorbed Element to enemies compared to other Transformative Reactions.
- Chain reactions involving Electro Swirls are Transformative, so they scale well with EM (e.g., Sucrose using Electro Swirls to gain ownership of Electro-Charged reactions).
- Electro may coexist with Hydro, allowing for both to be Swirled in some scenarios for extra damage. This is commonly referred to as “Double Swirl” and can be read about in more detail in the Theorycrafting Library.
- Electro is generally of low priority in terms of Swirl’s Elemental Absorption (something described in-depth in this Genshin Wiki article) . As long as an Electro aura can be maintained on the enemy (which Swirls themselves may help with), further Electro reactions can be triggered via absorbed Elements.
Swirl has a damage limit of 2 instances per 0.5s. In practice, this means that Swirl gets at least two times as many damage instances per target against multiple targets than it does against a single target.
Quicken
When both Electro and Dendro are applied to an enemy, a Quicken aura is created. Attacks that apply Electro to a Quicken aura deal bonus damage through Aggravate; attacks that apply Dendro to a Quicken aura deal bonus damage through Spread. It is worth noting that, unlike other reactions, Aggravate and Spread do not reduce Quicken aura duration, incentivizing frequent triggers from multiple units.
Fischl is a notable off-field unit in Aggravate teams due to her A4, which triggers when the active character triggers an Electro-related Elemental Reaction so long as Oz is also on-field. Every attack from the on-field unit that applies Electro to an enemy with a Quicken aura triggers Aggravate, triggering Fischl’s A4, and her A4 can always trigger Aggravate because it has no ICD on its Electro application. Fischl’s A4 can also be reliably activated by Anemo drivers like Sucrose who trigger many Electro reactions of their own.
However, Spread is not considered an Electro reaction, which means it does not trigger Fischl’s A4. Nonetheless, Fischl remains valuable as a consistent source of both damage and Electro application in Spread teams. Nevertheless, Quicken itself still counts as an Electro reaction, meaning that Dendro characters can still trigger Fischl’s A4, though much less frequently than Electro or Anemo units.
It is worth noting that Aggravate is an Additive Reaction, meaning it adds to the base damage of the triggering attack. So, it benefits not only from EM but also from CRIT, Electro DMG% and character level.
Hyperbloom
Hyperbloom is triggered when a Dendro Core is inflicted by Electro, after which it is replaced by a homing projectile that targets the closest enemy and deals Dendro damage in a very small AoE. Fischl is an inconsistent Hyperbloom trigger, since Oz is a single-target turret with non-controllable auto-targeting. However, Fischl can steal Hyperblooms depending on the enemy’s size. Dendro Cores have different targeting priority depending on the part of Fischl’s kit:
- Oz and C6 attacks do not prioritize Dendro Cores but may hit cores in the way.
- Fischl’s A4 procs have a small AoE of Electro application that can also target Dendro Cores.
Despite this, she can work well in teams where another character acts as the dedicated Hyperbloom trigger. It is also possible to trigger Hyperbloom via Swirls from an Anemo character, and certain teams are built around this mechanic.
Crystallize
When Geo is applied to an enemy with an Electro aura, Electro Crystallize is triggered, which produces an Electro Elemental Shard that can be picked up to grant a temporary shield. Crystallize does not deal any damage. While the shield is weak against non-Electro attacks, it can trigger certain effects.
- 4pc Archaic Petra increases the team’s Electro damage if the holder picks up the shard generated by Electro Crystallize. This may be cumbersome and could interfere with rotations. Compared to 4pc Viridescent Venerer, the damage increase is generally smaller and only exists for one Element at a time.
- Geo Resonance requires the active character to be protected by a shield, so Crystallize shields may help with Geo Resonance buff uptime.
- Gorou’s C2 extends the duration of his buff by 1s if an Elemental Shard generated by Crystallize is picked up.
Fischl’s high rate of Electro application means that Geo attacks from teammates can consistently generate Electro Elemental Shards via Crystallize. While Crystallize is a niche reaction, its potential utility should not be overlooked.
Off-Field Builds

“To condemn the guilty, to sanctify the just, and to draw all castaway dreams into the embrace of the infinite Immernachtreich. This is the birthright of the Prinzessin der Verurteilung, and her burden. None may gainsay it.”
This section covers Fischl’s desired builds for both off-field and on-field playstyles. To keep things concise, the recommendations assume the player is preparing for Spiral Abyss, with playstyle information catered to a broad range of Abyss content.
Level and Talent Priority
 ≥
≥  >>
>> 
Skill > Burst >> Normal Attack
Oz scales with Fischl’s Skill level, regardless of how he is summoned. As such, Fischl’s Skill has the highest leveling priority for her off-field playstyle. Additionally, it is still recommended to level her Burst to Talent Level 6 due to the cheap resource cost for extra damage.
Note that if Fischl is in an Aggravate team, Level 90 is a significant damage increase from Level 80.
ER Requirements
While Fischl’s ER requirements are typically low, running some additional ER is generally recommended unless you only cast your Burst every other rotation.
Assumptions
- Default enemy particles + safe mode.
- Yelan, Zhongli, Kazuha, Layla, Yaoyao, Xingqiu, Rosaria and Chevreuse hold Favonius.
- Zhongli has .25 pillar uptime.
- Fischl doesn't get HP particles in hypercarry teams (Eula, Navia, Neuvillette).
For more information on the teams used to calculate the following ranges, you may check the Fischl Guide ERC.
| Solo Electro | Double Electro | |
| C0 — Skill + Burst Every ~40s | 120–140% | 100% |
| C6 — Skill + Burst Every ~40s | 110–125% | 100% |
| C0 — Skill + Burst Every ~25s | 130–170% | 100–125% |
| C6 — Skill + Burst Every ~25s | 120–155% | 100–115% |
If you are unsure of how much ER you need, consult the Energy Recharge Calculator or GCSIM.
Artifact Stats
Sands | Goblet | Circlet |
| ATK% or EM (Aggravate) | Electro DMG Bonus | CRIT Rate or CRIT DMG |
Stat Priority
Aggravate: ER% (until requirement) > CRIT > ATK% = EM
Non-Aggravate: ER% (until requirement) > CRIT > ATK%
Fischl prefers a 1:2 CRIT Rate to CRIT DMG ratio, so pick the CRIT Circlet that fits best. In Aggravate teams, EM and ATK% Sands perform similarly; ATK% can pull ahead with EM buffs or weapons and EM can perform better with ATK buffs or weapons.
Prioritize meeting ER requirements. Afterwards, CRIT stats are the most valuable, followed closely by ATK%, with Flat ATK being worth about half of that. EM becomes a good stat and is comparable to ATK% in Fischl’s Aggravate teams. Otherwise, it's only a minor buff to Transformative Reactions, which make up a small percentage of her damage.
ATK% Goblets are not recommended as they are often a downgrade from Electro DMG% Goblets. See the FAQ for a detailed explanation.
We recommend using Genshin Optimizer along with a multi-opt config to compare your actual artifacts.
Artifact Sets
Artifact Set Overview
The following 4pc artifact sets are not listed in order of strength.
 4pc Golden Troupe (GT) | 4pc Golden Troupe is Fischl’s best artifact set in a majority of teams, as it provides a 70% Skill DMG Bonus when off-field (which applies to Oz, her A4, and her C6). It performs 15–20% better than her alternatives for Fischl’s personal damage, so you should farm this set even if you already have other builds. Furthermore, 4pc Golden Troupe and 4pc Marechaussee Hunter are high in demand for many units, so the Domain is generally valuable to farm. |
 2pc Mixed Sets | 2pc Bonuses: ATK%, ER%, EM, Skill DMG%, Electro DMG% Combinations of any 2-piece sets that boost Fischl’s damage are welcome and often optimal for players without usable Golden Troupe artifacts. Sets worth considering include any providing ATK%, ER%, or EM, 2pc Golden Troupe, and 2pc Thundering Fury. |
 4pc Thundering Fury (TF) | While Thundering Fury provides a good 2-piece effect for Fischl, the 4-piece set is typically not recommended as the cooldown reduction only applies to the on-field character. The DMG Bonus provided by 4pc TF is significant in Aggravate teams, but it is still not enough to top 2pc TF + 2pc ATK%. Nevertheless, 4pc TF’s cooldown reduction can shorten Fischl’s rotation time to 22–23s, or even 20s when she has more field time. This can be useful to sync Fischl’s abilities with those of her teammates. |
 4pc Gilded Dreams (GD) | 4pc Gilded Dreams is a strong option for Fischl in Dendro teams. Its downside is that the buff requires triggering a reaction to activate. Using Burst first and hitting an enemy will trigger a reaction, but this method is inconsistent due to ping dependency and the time spent to hit an enemy. This means Oz may not snapshot the ATK% buff in the first rotation or in other circumstances without re-summons. Fortunately, Aggravate is calculated dynamically, meaning Fischl always benefits from the EM bonus, putting it on par with 2pc TF + 2pc ATK%. |
 4pc Tenacity of the Millelith (TotM) | While TotM’s 2-piece set effect is useless on Fischl, she is good at activating its 4-piece effect, which provides a decent teamwide ATK% buff. In theory, 4pc TotM may outperform other sets depending on how team damage is split towards other characters, such as with Eula. It is possible to recast Oz for the buff if you have rotation time. Use the Strongbox if you want to farm TotM unless you are also farming 4pc Pale Flame. |
 4pc Thundersoother (TS) | 4pc Thundersoother is a decent option for off-field Fischl due to a strong 35% DMG Bonus against enemies affected by an Electro aura. A good amount of Aggravate teams have high Electro aura uptime, since both Quicken and Electro auras can coexist. In teams with Nahida, high Electro application from an Electro teammate is necessary to maintain a simultaneous Electro aura, since Nahida has very strong Dendro application. |
Artifact Set DPS Comparison
Assumptions
- C6 Fischl, Level 90, Talent Level 9 | 12 | 12, R1 Alley Hunter.
- The weapon rankings are based on the approximate ranges of team DPS percentages from three gcsim teams:
- Fischl — Raiden — Kazuha — Bennett
- Fischl — Keqing — Kazuha — Baizhu
- Fischl — Beidou — Kazuha — Kokomi (2 targets).
For more information on the calculations, simulations, and Fischl’s personal DPS increases, please check the Fischl Mastersheet.
| 4pc Golden Troupe | 100% |
| 4pc Gilded Dreams | 90% |
| 2pc Golden Troupe + 2pc Thundering Fury | 90% |
| 4pc Thundersoother | 90% |
| 4pc Thundering Fury | 90% |
| 4pc Tenacity of the Millelith | 89% |
| 4pc Golden Troupe | 100% |
| 2pc Golden Troupe + 2pc Thundering Fury | 97% |
| 4pc Tenacity of the Millelith | 97% |
| 4pc Thundersoother | 96% |
| 4pc Thundering Fury | 94% |
| 4pc Gilded Dreams | 93% |
| 4pc Golden Troupe | 100% |
| 4pc Tenacity of the Millelith | 98% |
| 2pc Golden Troupe + 2pc Thundering Fury | 97% |
| 4pc Thundersoother | 96% |
| 4pc Thundering Fury | 96% |
| 4pc Gilded Dreams | 96% |
Weapons
Weapon Overview
 Polar Star | Polar Star is off-field Fischl’s Best-in-Slot weapon, as it provides valuable CRIT Rate and unconditional Skill and Burst DMG% buffs. It is best to perform a Normal Attack before summoning Oz to snapshot an extra stack of the ATK% buff; otherwise, it performs slightly worse than usual. |
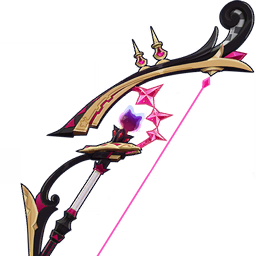 The First Great Magic | The First Great Magic is a strong Bow for Fischl, as most of her teams run her with a second Electro unit (as do all the teams used for these calculations), which stacks the passive’s ATK% buff in addition to its CRIT DMG secondary stat. In some cases, it even outperforms a zero-stacked Polar Star. The First Great Magic decreases in effectiveness if Fischl is the only Electro unit in the team, which can make it lose out to other 5-star options. |
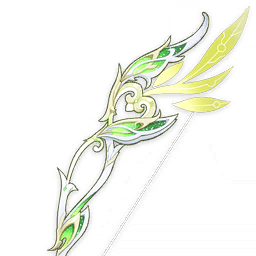 Hunter’s Path | Hunter’s Path is a very strong option due to its high CRIT Rate secondary stat and its unconditional Elemental DMG% buff. Note that this weapon performs slightly worse outside of Aggravate without external Flat ATK buffs due to its lower Base ATK. |
 Aqua Simulacra | Aqua Simulacra provides a hefty CRIT DMG secondary stat and a great DMG% passive that can be maintained by sticking close to enemies. Note that this weapon performs slightly worse outside of Aggravate without external Flat ATK buffs due to its lower Base ATK. |
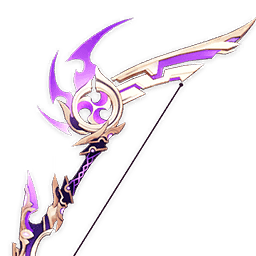 Thundering Pulse | Thundering Pulse is another great CRIT DMG Bow, this time with an unconditional ATK% increase. While it performs slightly worse than the above options, Thundering Pulse gets bonus points for having the best drip. |
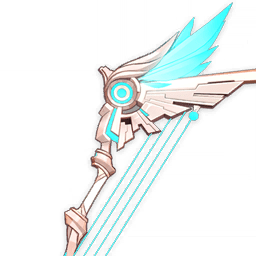 Skyward Harp | Skyward Harp has a high Base ATK and a decent CRIT Rate secondary stat. Apart from its unconditional CRIT DMG buff, the damage from its passive is overall mediocre due to Fischl’s low field time. Nevertheless, Skyward Harp remains a solid option. |
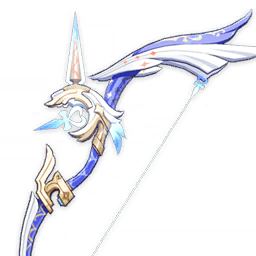 Amos’ Bow | Amos’ Bow has okay ATK% stats but a passive that is useless on off-field Fischl. Other 4-star Bows perform better than Amos in Aggravate teams or in teams with many external ATK% buffs. Despite this, Amos remains an overall decent option. |
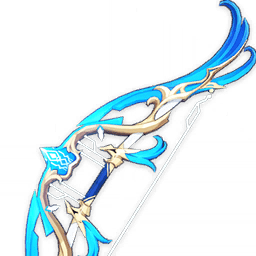 Elegy for the End | Elegy for the End allows Fischl to buff her team with a substantial 20% ATK and 100 EM, but this comes at the cost of decreasing her significant personal damage. While Oz is quite good at triggering Elegy’s passive, he only benefits from the EM buff in certain teams. Furthermore, the passive’s 20s downtime may desync with rotations, leading to a DPS loss. If you work around these considerations and use Elegy in a team that benefits from the EM buff, it can be quite good — such team archetypes include Quicken, Overvape, and Hyperbloom. In teams with multiple damage dealers such as Alhaitham Spread, it can even be Fischl’s BiS. However, you should consider if another character could make better use of Elegy, such as Yelan in Overvape. |
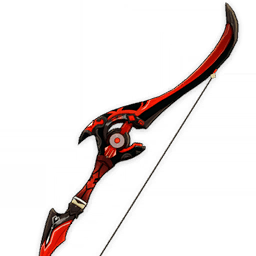 Blackcliff Warbow | Blackcliff Warbow provides useful CRIT DMG through its secondary stat, but its passive’s ATK% buff is unreliable and inconsistent. A decent option for Fischl if you have it, but not worth buying from the Shop otherwise. |
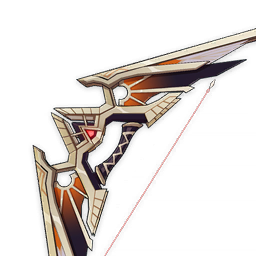 Scion of the Blazing Sun | Scion has a decent CRIT Rate secondary stat, but off-field Fischl cannot utilize its Charged Attack DMG% buff. It can be purchased through the Battle Pass. |
 The Viridescent Hunt | Viridescent Hunt provides useful CRIT Rate via its secondary stat and is available through the Battle Pass. The cyclone generated by its passive deals negligible additional damage but has niche uses for grouping and causing fall damage. |
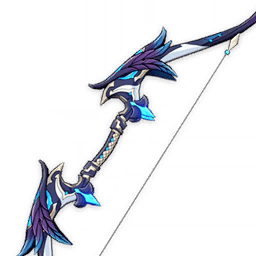 Alley Hunter | Alley Hunter is a strong 4-star option with a passive that offers a large amount of DMG%. The passive is stacked by being off-field, which synergizes well with Fischl’s off-field playstyle. It is only available through the Weapon Banner. |
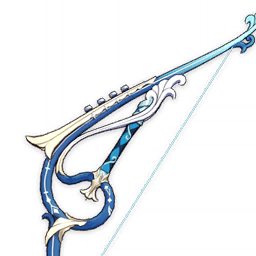 The Stringless | Stringless is Aggravate Fischl’s strongest 4-star Bow due to its good stats and excellent passive, which boosts Skill and Burst DMG%. Outside of Quicken, other options outperform it. Note that the performance of Stringless is more dependent on its refinements compared to other weapons. |
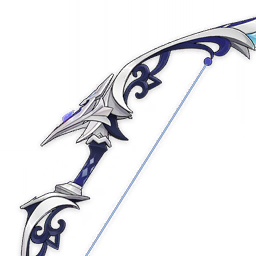 Range Gauge, Song of Stillness | Song of Stillness is a Fontaine craftable weapon while Range Gauge is limited to Weapon Banner only. Both Bows provide valuable buffs that apply even off-field. Range Gauge brings Elemental DMG% and ATK% and Song of Stillness gives DMG%, and the longevity of these buffs sets both Bows apart from other ATK% options. As their buffs are reliant on Fischl being healed, Fischl should run with a healer if equipped with either weapon. Note that Fischl’s C4 self-healing from her Burst happens after the snapshot, and cannot be used to stack the passive unless Oz is resummoned. |
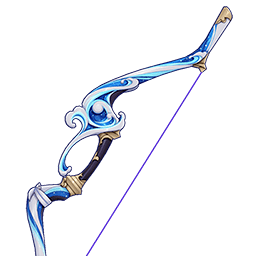 ATK% Bows | Mouun’s Moon, Hamayumi, Ibis Piercer, King’s Squire, Prototype Crescent, Rust, Royal Bow General ATK% weapons with passives that do not benefit off-field Fischl. Hamayumi, Prototype Crescent, and King’s Squire are all craftable weapons, while Ibis Piercer was freely obtainable during a past event. Mouun’s Moon and Royal Bow are only available through the Weapon Banner and the Starglitter shop, respectively. Prototype Crescent requires Fischl to hit enemy weak points to benefit from its passive — a feat that is impractical in regular combat. Note that the passive does not require a fully-charged shot and can be triggered by an uncharged Aimed Shot. If you do not hit enemy weak points with Prototype Crescent, it ties with Rust. While Royal Bow’s passive appears useful, it is not worth spending time building up stacks due to the inconsistency of knowing when to stop and the time taken. It is definitely not worth the Starglitter to purchase. |
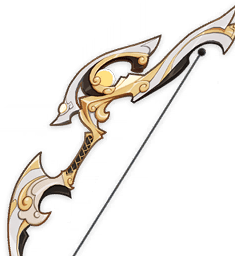 Fading Twilight | Fading Twilight is a 4-star Bow freely obtained during an event in Version 2.7. It is the recommended free option if you have it and do not want to craft Prototype Crescent. It has a good passive and gains value if you need extra ER% stats. |
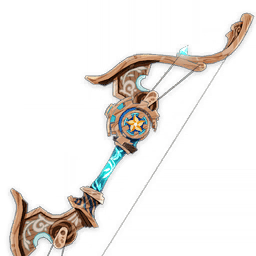 Windblume Ode | An old event weapon, Windblume Ode provides EM through its secondary stat and a decent ATK% buff through its passive. It performs decently in Quicken but falls off otherwise. |
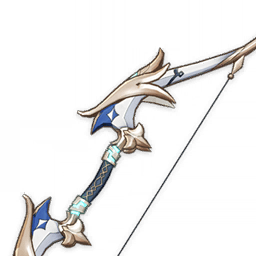 Favonius Warbow | While Favonius Warbow provides nothing for Fischl’s personal damage, its Energy particle generation lowers the ER needs of her teammates, allowing them to build more offensive stats. There is usually a better teammate to equip a Favonius weapon on, but should players lack other Favonius weapons, Favonius on Fischl is serviceable though underwhelming. |
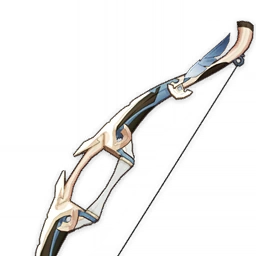 Sharpshooter’s Oath, Slingshot | Both Bows are accessible 3-star options that can serve as decent transitory gear for players with no better weapon options. |
Weapon Comparison
Assumptions
- C6 Fischl, Level 90, Talent Levels 9 | 12 | 12, 4pc Golden Troupe
- The weapon rankings are based on the approximate ranges of team DPS percentages from three gcsim teams:
- Fischl — Raiden — Kazuha — Bennett
- Fischl — Keqing — Kazuha — Baizhu
- Fischl — Beidou — Kazuha — Kokomi (2 targets).
Not all weapons were listed in the table below for brevity. For more information on the calculations, simulations, Fischl’s personal DPS increases, and 3-star weapon performances, please check the Fischl Mastersheet.
The 100% baseline used is a 510 Base ATK Bow with ATK% secondary stat and no passive, which would match Rust or Prototype Crescent with its passive inactive.
| R1 Hunter’s Path | 115% |
| R1 Aqua Simulacra | 115% |
| R1 Polar Star | 114% |
| R1 The First Great Magic | 113% |
| R1 Thundering Pulse | 111% |
| R1 Skyward Harp | 110% |
| R5 The Stringless | 109% |
| R3 The Stringless | 107% |
| R1 Elegy for the End | 107% |
| R5 Song of Stillness | 105% |
| R1 The Viridescent Hunt | 105% |
| R5 Range Gauge | 104% |
| R1 Amos’ Bow | 103% |
| R1 Alley Hunter | 103% |
| R1 Blackcliff Warbow | 103% |
| R1 Scion of the Blazing Sun | 102% |
| R5 Windblume Ode | 102% |
| R5 Slingshot | 101% |
| R1 Royal Bow | 100% |
| R5 King’s Squire | 100% |
| R1 Mouun’s Moon | 100% |
| R5 Sharpshooter’s Oath | 100% |
| R5 Hamayumi | 100% |
| Rust, Prototype Crescent (no passive) | 100% |
| R5 Fading Twilight | 100% |
| R5 Ibis Piercer | 100% |
| R3 Favonius Warbow | 95% |
| R1 Polar Star | 111% |
| R1 Hunter’s Path | 110% |
| R1 Aqua Simulacra | 110% |
| R1 The First Great Magic | 110% |
| R1 Thundering Pulse | 109% |
| R1 Skyward Harp | 109% |
| R1 Elegy for the End | 103% |
| R1 Amos’ Bow | 103% |
| R1 Alley Hunter | 103% |
| R5 Range Gauge | 103% |
| R1 The Viridescent Hunt | 103% |
| R5 The Stringless | 103% |
| R1 Blackcliff Warbow | 101% |
| R3 The Stringless | 101% |
| R5 Ibis Piercer | 101% |
| R1 Mouun’s Moon | 101% |
| R1 Scion of the Blazing Sun | 101% |
| R5 Song of Stillness | 101% |
| R5 Hamayumi | 100% |
| R1 Royal Bow | 100% |
| R5 King’s Squire | 100% |
| Rust, Prototype Crescent (no passive) | 100% |
| R5 Fading Twilight | 100% |
| R5 Slingshot | 99% |
| R5 Sharpshooter’s Oath | 99% |
| R5 Windblume Ode | 97% |
| R3 Favonius Warbow | 96% |
| R1 Polar Star | 106% |
| R1 Thundering Pulse | 106% |
| R1 Hunter’s Path | 105% |
| R1 Elegy for the End | 105% |
| R1 Aqua Simulacra | 105% |
| R1 Skyward Harp | 104% |
| R1 The First Great Magic | 104% |
| R1 Amos’ Bow | 103% |
| R5 Song of Stillness | 102% |
| R5 The Stringless | 102% |
| R1 Alley Hunter | 102% |
| R1 The Viridescent Hunt | 101% |
| R5 Range Gauge | 101% |
| R3 The Stringless | 101% |
| R1 Blackcliff Warbow | 100% |
| R1 Mouun’s Moon | 100% |
| R5 Ibis Piercer | 100% |
| R5 King’s Squire | 100% |
| Rust, Prototype Crescent (no passive) | 100% |
| R1 Royal Bow | 100% |
| R5 Hamayumi | 100% |
| R5 Fading Twilight | 100% |
| R1 Scion of the Blazing Sun | 100% |
| R5 Windblume Ode | 99% |
| R5 Sharpshooter’s Oath | 98% |
| R3 Favonius Warbow | 97% |
| R5 Slingshot | 96% |
Off-Field Gameplay
Fischl is a popular pick for an off-field character due to her ease of use and low field time requirements. However, she often fulfills more important roles than people realize. This section covers fundamental mechanics of Fischl’s kit that help you better understand her utility and functionality.
Fischl is the premier Electro Particle generator, having strong synergy with other Electro units. Fischl also lowers ER requirements for non-Electro units, although the reduction is less pronounced and those units may prefer other dedicated batteries of the same Element.
Electro Application
Fischl is an excellent Electro applier. However, there are some important mechanics to consider in order to maximize her potential.
Rate of Electro Application
Fischl’s Electro application rate depends on multiple factors. It varies widely from team to team and affects her own damage as well via the frequency of A4 procs. There are three key sources of Electro application in Fischl’s kit: Oz, Fischl’s C6, and her A4 Passive.
- Oz and Fischl’s C6: Oz fires one attack per second and applies 1U Electro with a 4 hit/5s ICD. He is a reasonable source of Electro application on his own. Since Oz’s turret shots share ICD with Fischl’s C6 (i.e., C6 hits effectively count as Oz’s shots for Electro application purposes), Oz’s Electro application is significantly enhanced by her C6 in conjunction with fast-attacking characters.
- A4: Triggers whenever the on-field character triggers an Electro reaction, with a 0.5s cooldown. Fischl’s A4 procs apply 1U of Electro without ICD. This is what allows Fischl to keep an Electro aura up indefinitely in many teams. However, if the Electro aura is cleared, it may become difficult to re-establish a new Electro aura, which plays a significant role in Overloaded teams.
Elemental Shield Break
Fischl’s high rate of Electro application can be used to break certain shields. Even though there is often a more efficient Element or character for breaking any given Elemental shield, using Fischl’s A4 Electro application by having her on-field is serviceable if without other options. You may read the KQM Theorycrafting Library or the Genshin Impact Wiki for more information on Elemental Gauge Theory.
Buffing
Although Fischl herself does not have buffing in her base kit, her synergy with various supportive weapons and artifacts can let her buff her teammates nonetheless. 4pc Tenacity of the Millelith provides a 20% ATK buff to the rest of the team, and Fischl can maintain practically 100% uptime thanks to Oz. It is only recommended to farm this set using the Artifact Strongbox (unless you are also farming for Pale Flame).
Elegy for the End, a 5-star Bow, is a solid buffing option in Overvape and Quicken teams if you have access to it.
Rotations
As mentioned before, Fischl’s Burst has a 15s cooldown while her Skill has a 25s cooldown, which can greatly limit rotation options.
The time gap between Fischl’s Skill and Burst casts usually depends on her teammates’ field time needs. For teams without strict rotations, Fischl can use her Elemental Skill off cooldown and alternate between casting her Skill and Burst, making her personal rotation 25s long.
For teams with strict rotations, Fischl’s personal rotation must be at least 25s long. You have two options to achieve this:
- Extend the team’s rotation to 25s. This is generally a good idea only if the rotation is already very close to 25s (e.g., Xiangling or Ayato rotations where they use their Skill twice or many Neuvillette rotations).
- Extend Fischl’s personal rotation beyond 25s without adjusting the team’s rotation (Fischl’s personal rotation will be either a standard 1 Skill per 1 Burst rotation, or she will start with her Burst, refresh Oz with her Skill, and end with her Burst before repeating). Fischl’s personal rotation length should be the next highest multiple of the team’s rotation length. For example, in a Hu Tao team whose team rotation is 21s, Fischl uses a 42s personal rotation, either alternating between Skill and Burst in separate 21s intervals or using Burst every rotation and only using her Skill every other. Read the following section for more explanation.
Casting Burst Early
Because Fischl's Burst has a 15s cooldown and the ability to extend Oz's uptime, one might think that it is possible to shorten her total rotation time. However, Fischl’s Skill cooldown is still 25s, which is unaffected by the Burst. This means that potential rotations look a bit like:
Burst > Skill > Burst > Burst > Skill > Burst > …
This pattern allows Fischl to fit into rotations shorter than 25s. Generally speaking, Fischl uses her Burst every rotation and fills some of her downtime with Skill casts. This is preferred with on-field Raiden, who wants Fischl to Burst every rotation for Resolve stacks and is able to provide Fischl with the Energy to do so. However, in other cases, Fischl would need to build enough Energy Recharge to refill her Burst in consecutive rotations, which is generally only viable in Double Electro teams.
Skill and Burst Order
When extending Oz’s uptime, it is generally not ideal to overwrite her Elemental Skill with her Burst. However, if the team’s rotation demands that Fischl can only take the field within 10s (or 12s) of her previous swap-in, then it is important to use her Burst to overwrite her Elemental Skill, since she cannot do so the other way around.
Outside of extending Oz’s uptime, starting with Fischl’s Elemental Skill or her Elemental Burst depends on the duration of the battle. It is not a good idea to end a fight using Fischl’s Elemental Burst, as she will start the next fight without enough Energy to use her Burst when she needs it. This is especially important in Abyss floors where enemies can avoid Oz’s attacks, as that prevents Oz from generating Energy and leads to a significant Energy deficit.
Synergies

“Should this world, like a beast prowling in the night, covet your dreams, then I, Prinzessin der Verurteilung, shall fell it with my ensorcelled arrows of judgment!”
Fischl has synergy with a wide range of characters, which makes her a great pick in a variety of reaction-based team compositions. Note that even if a synergy isn't highly rated or included, that doesn’t mean it can never be considered; it is highly recommended to experiment with Fischl’s large variety of uses.
Electro
 Beidou | Fischl is the best battery for Beidou in the game excluding Raiden (who is not able to trigger Beidou’s Burst). While Fischl excels in single-target scenarios, Beidou performs best in 2–3 target scenarios, allowing them to make up for each other’s weaknesses. They work particularly well together in Aggravate and Electro-Charged teams. |
 Yae Miko | Yae and Fischl have good synergy: Fischl can supply particles to fuel Yae’s expensive Burst, and the length of Yae’s rotations tend to align with those of Fischl’s. Overall a solid pick for Electro-Charged or Aggravate teams. For Aggravate, Yae is a consistent trigger for Fischl's A4 when on-field. |
 Keqing | Keqing and Fischl make for a strong duo. Keqing is good at triggering Fischl’s A4 in Aggravate teams, and Fischl appreciates Keqing’s 12–15s rotations as they enable high Oz uptime. |
 Raiden | Fischl and Raiden create a strong core that generates tremendous Energy and deals significant damage. Raiden allows Fischl to use her Burst every rotation without having Energy issues, and Fischl helps stack Raiden’s resolve in return. This pair is very flexible and can be played with other off-field DPS units or buffers. |
 Shinobu | Fischl can slot in as a second Electro unit in Hyperbloom teams with Shinobu as the Hyperbloom trigger. Fischl can add extra single-target damage while triggering Electro-Charged and maintaining Quicken uptime, but she has the issue of potentially stealing Hyperblooms. Shinobu also works with Fischl in Spread teams as a defensive option. |
 Lisa | Lisa serves as a strong second Electro unit in Aggravate AoE scenarios and can trigger Fischl’s A4 frequently. Lisa benefits significantly from Oz’s particle generation, and Fischl appreciates the DEF Shred from Lisa’s Burst. Shielders or Constellations make Lisa more comfortable to play as an on-fielder, but these are by no means mandatory. |
 Cyno | Cyno demands high field time that often results in subpar Oz uptime, but he benefits from Electro Resonance. His teams’ rotations can start with Fischl’s Skill and use Fischl’s Burst right before his field time to maximize Oz uptime. That being said, Cyno has alternatives like Beidou and Shinobu competing for the second Electro slot in his teams. |
 Sara | Sara provides Fischl with a decent Flat ATK buff that is unfortunately underwhelming without Sara’s C6. Note that characters cannot snapshot Sara’s C6, so the buff’s uptime is suboptimal. Sara is generally easily replaceable by other characters who provide extra damage. |
Pyro
 Hu Tao | Fischl can push Hu Tao’s single-target damage even further against heavy enemies in Overvape teams. Hu Tao gets ownership over Overloaded, which does considerable damage, since she builds some EM. In addition, an Electro-Charged aura can allow Hydro auras to last longer as Pyro reacts with Electro first, lowering the gauge that Pyro takes from the Hydro. This means C0 Yelan can be run as a solo Hydro unit when Fischl is present, whereas, without Electro, Hu Tao’s Pyro can overwhelm Yelan’s Hydro application. Fischl can also lower the ER requirements of Hu Tao’s most popular teammates like Xingqiu and Yelan, allowing them to build with more offensive stats. |
 Yoimiya | Yoimiya benefits from Fischl’s single-target damage and ability to enable Overvape, with Overloaded providing some helpful AoE damage. Yoimiya’s kit also centers around Normal Attacks, which means she effectively triggers Fischl’s C6. As a ranged unit, Yoimiya also has an easier time dealing with the knockback from Overloaded. |
 Chevreuse | Chevreuse’s unique kit makes pure Overloaded teams more viable. In addition to shredding Pyro and Electro RES, she also offers an ATK% buff and Electro and Pyro DMG% (at C6), all while consolidating healing. Fischl is one of Chevreuse’s best pairings, since Chevreuse requires consistent Overloaded reactions and her teams often run Energy-hungry units. |
 Diluc | Diluc can be played in an Overvape team with Fischl and a Hydro applier. Unlike the other two, however, Diluc can be swapped off-field without losing his Pyro Infusion, which allows for better Oz uptime. |
 Yanfei | Similar to other on-field Pyro DPS units, Yanfei’s teams can slot in Fischl to enable Overvape. Since Yanfei is a ranged unit, the knockback from Overloaded is less of an issue for her. Yanfei can also use EM-focused Overloaded builds, as Fischl is the only character who can maintain Electro for Overloaded for Yanfei on her own. When building Yanfei for Overloaded, avoid CRIT Rate substats, since Yanfei A4’s Pyro damage could consume Fischl’s Electro aura and prevent Yanfei from triggering further Overloaded reactions. |
 Gaming | Gaming is an on-field DPS unit centered around Plunging Attacks. Fischl’s Electro application can be useful for clearing Pyro auras and enabling him to trigger Overloaded or Vaporize. |
 Thoma | Fischl contributes good single-target damage to supplement the damage of Burgeon teams. Her lackluster ability to target Dendro Cores is an advantage here because it allows Thoma to more reliably trigger Burgeon. In addition, the Electro application from Fischl reduces Burning uptime in Burgeon teams, and Electro-Charged mechanics potentially enable more Bloom reactions. That being said, Fischl will have some ownership of Hyperblooms, though this isn’t a huge issue in comparison to what she offers the team. |
 Bennett | While Bennett is obviously a strong support for his Flat ATK buff, Fischl has other buffer options, making him good but not a defining synergy. The exception for this is if you play 4pc TF Bennett to make the most of his Skill and the Skill cooldown reduction from his A4 Passive. |
 Xiangling | Xiangling ascends with EM and tends to build EM, making her a solid candidate for Overvape teams. That being said, since Xiangling is often used off-field, she cannot trigger Fischl’s A4. In addition, Xiangling usually has better options that increase her personal damage. |
Cryo
 Eula | Eula wants a source of Electro for Superconduct. Fischl’s solid damage and consistent Electro application make her one of Eula’s better partners. |
 Rosaria | Rosaria is often used as a second off-field Cryo unit in Physical teams that may use Fischl as the Electro applier. She provides a CRIT Rate increase that Fischl can snapshot. Otherwise, there is no innate synergy between the two. |
 Shenhe | Shenhe is a common pick for Superconduct teams for her ability to shred enemy Physical RES. Since characters cannot snapshot her A4 Passive buff, Oz can make use of its dynamic scaling throughout the duration. |
 Freminet | Freminet’s Physical playstyles greatly desire an Electro unit to enable Superconduct. He appreciates Fischl’s high particle generation to lower his ER requirements, and his frequent Normal Attacks synergize with Fischl’s C6. |
Hydro
 Xingqiu | Xingqiu provides strong Hydro application and single-target damage, making him great for enabling Electro-Charged and Hyperbloom. He also has damage reduction, interruption resistance, and chip healing, allowing for strong role compression. |
 Yelan | Yelan provides strong personal damage and a ramping DMG% buff. While she lacks defensive utility and has lower Hydro application pre-C2 in comparison to C6 Xingqiu, she is still a great pick with Fischl (in teams like Overvape Hu Tao). It is important to note that her DMG% buff is dynamic and only applies to the on-field character, meaning Fischl rarely benefits from it. |
 Ayato | Ayato is a good driver for Overvape teams, which rely on a combination of Overloaded, Electro-Charged, and Swirl reactions. Fischl’s high rate of Electro application makes her a core member of these teams, enabling Electro reactions and reducing Ayato’s significant ER requirements. In addition to this, Fischl can be used in some of Ayato’s Electro-Charged and Hyperbloom teams to provide extra damage and particle generation. Fischl’s desired rotations line up with Ayato's 2 Skill rotation, with Fischl alternating her Skill or Burst after Ayato’s Skills. |
 Neuvillette | Neuvillette is an on-field DPS who deals damage in a large AoE with his special Charged Attacks. His A1 Passive encourages bringing teammates of other Elements, and his Burst reliance makes good use of Fischl’s high particle generation. Thanks to his rotation flexibility, he can easily swap out to let Fischl refresh Oz. |
 Kokomi | Kokomi is a flexible unit that can fit into many teams with Fischl, albeit sometimes at the cost of higher-damage alternatives. As an on-field DPS, she can trigger a high number of C6 hits, and many of her best weapon choices such as Hakushin Ring and Thrilling Tales of Dragon Slayers can buff Fischl well. Example compositions include Electro-Charged, Overvape, and Hyperbloom (where Fischl acts as the second Electro unit). |
 Furina | Furina offers consistent off-field damage and Hydro application via her Skill, along with potent team buffs through her Burst. However, her teamwide HP drain necessitates strong healing, which limits her teambuilding options. Fischl’s C4 self-heal is a marginal boost to Fanfare generation, granting 20 stacks upon use of Fischl’s Burst. |
 Childe | Childe is a serviceable driver for Electro-Charged teams with Fischl and Beidou due to all three units’ innately high damage. These teams are decent at multiple levels of investment but are less optimal than other popular compositions. |
 Mona | Mona’s Omen does not snapshot and only lasts several seconds without Freeze’s uptime extension, making Mona a poor buffer and teammate for Fischl. Only use Mona if you wish to nuke enemies with Oz and don’t have C6 Sara. |
Dendro
 Nahida | Nahida is a strong character and functions well with Fischl in Quicken and Hyperbloom teams. However, since Fischl is off-field, she does not benefit from Nahida’s on-field EM buff. Additionally, Nahida’s high rate of Dendro application makes it difficult to Swirl Electro in some setups and introduces limitations in Aggravate team compositions. |
 Baizhu | Baizhu provides off-field Dendro application and decent healing for Quicken teams. It should be noted that his A4 Passive can only maintain at most 50% uptime for Fischl. For artifacts, he can hold 4pc Instructor (to buff team EM) or 4pc Noblesse Oblige (to buff team ATK%). For weapons, he can hold Hakushin Ring (to increase team damage) or TTDS (to buff one teammate’s ATK). |
 Yaoyao | Yaoyao provides good role consolidation through her off-field Dendro application and decent healing for Quicken teams. Her Skill allows her to hold 4pc Tenacity to buff ATK-scaling teams, though its uptime is not entirely consistent. She can also equip 4pc Instructor for its teamwide EM buff. |
 Tighnari | Fischl is one of Tighnari’s best teammates, since she deals strong off-field damage and fits neatly into his rotations. You may slot in a second Electro unit to help trigger Quicken and proc Fischl’s A4, as this is often better than slotting in a second Dendro, particularly for players without Nahida. Tighnari’s 12s Skill cooldown lines up with Fischl’s desired rotations, with Fischl alternating her Skill or Burst. |
 Kirara | Kirara trades consistent off-field Dendro application in exchange for her shield. She can hold 4pc Noblesse Oblige or 4pc Instructor to buff the team. |
 Collei | Collei is useful in Aggravate teams due to her shorter rotations that allow better Oz uptime. Collei can also hold Elegy for the End and/or an artifact set such as 4pc Instructor, 4pc Tenacity of the Millelith, or 4pc Noblesse Oblige to buff teammates. |
 Alhaitham | Fischl provides sufficient particle generation and damage for Alhaitham. Since Spread does not trigger Fischl's A4, her personal damage plummets in comparison to Quicken teams with Electro on-fielders, especially without her C6. However, she still deals respectable damage. Note that Alhaitham ideally splits his field time when played with Fischl to maximize Oz uptime. |
 Dendro Traveler | Dendro Traveler is a functional Dendro unit for Aggravate or Hyperbloom teams, but they are outclassed in both of these roles and don’t provide any specific synergy other than being Dendro. |
Anemo
 Kazuha | Kazuha provides a large Electro DMG Bonus that Oz can snapshot, significantly increasing damage. Kazuha’s DMG% buff is particularly strong in teams with other DPS units of Elements that Kazuha can easily Swirl. In teams where Fischl is the sole Electro unit, it may be necessary to resummon Oz after Kazuha triggers an Electro Swirl. |
 Sucrose | Sucrose is an excellent driver for Fischl in AoE because she can shred enemy Elemental RES with 4pc VV, hold TTDS or Hakushin Ring for team buffs, and frequently trigger Fischl’s A4 Passive. In Dendro teams, Sucrose also buffs Fischl’s damage via her EM share. When paired with a Hydro and a Dendro unit, Fischl can enable Sucrose to trigger Hyperbloom by Swirling Electro off enemies. |
 Heizou | Heizou performs a similar role to Sucrose but generally slightly worse. He offers higher personal damage in some teams in exchange for a weaker EM buff, lower range, and worse grouping. |
 Venti | Venti is strongest in multi-target content, making up for Fischl’s weakness in AoE scenarios. Fischl provides Electro application and strong damage in Venti’s Anemo Overvape, Aggravate, and Electro-Charged teams. While Venti himself can't take full advantage of Oz without being on-field, many Electro units can take advantage of Venti’s Burst while triggering Fischl’s A4. |
 Wanderer | In teams that do not focus on buffing Wanderer’s personal damage, Fischl can provide off-field, single-target Electro damage and also act as a battery. Fischl’s Electro application also enables Wanderer’s Electro A4 buff, further alleviating his ER requirements. |
 Xiao | Fischl is a functional off-field battery for Xiao, boosting his team's damage against single-target content while generating Energy. |
 Sayu | Sayu condenses the roles of healing and applying 4pc VV RES Shred but has no additional buffs. On-field Sayu can trigger Fischl’s A4 Passive but not her C6. Her role consolidation lets her slot in as a last slot in teams without any defensive utility. However, it is often more worthwhile to use a healer of another Element when not focusing on on-field Sayu. |
 Jean | Jean can heal and provide 4pc VV RES Shred for the team, but it is often more worthwhile to use a healer of another Element. Her teamwide healing does gain significant value in teams with Furina. |
 Xianyun | Xianyun enables virtually any character to become a Plunging Attack DPS unit. Similarly to Jean, she can also consolidate 4pc Viridescent Venerer RES Shred (VV Shred) and continuous teamwide healing, which is particularly useful in teams with Furina. |
 Lynette | Lynette is an accessible Anemo option who provides 4pc VV RES Shred and a teamwide ATK% buff via her A1 Passive. Her Burst deals off-field damage and can taunt enemies. However, these utilities are generally not as powerful as those of other Anemo units. At C6, she can act as an on-field driver; her Normal Attacks can frequently trigger Fischl’s A4. |
Geo
 Zhongli | Zhongli provides the strongest shield in the game and a 20% Universal RES Shred. His buffing capabilities can be increased with 4pc Archaic Petra; however, it can be inconvenient to pick up Crystallize shards to activate the buff. Zhongli could also hold 4pc Tenacity of the Millelith, but his pillar may break or not hit enemies. Physical Zhongli is a good driver for Fischl’s C6 and enjoys Fischl’s Electro application for Superconduct. |
 Noelle | Fischl is one of the better options for Noelle’s Triple Geo teams because she provides off-field Electro damage, Crystallize shields, and extra Energy. Noelle greatly appreciates Fischl’s particle generation, since she cannot generate particles herself.. |
 Itto | Fischl is also a decent option in Itto’s Triple Geo teams, but he isn’t as much in need of Fischl’s extra particles. Additionally, Oz has low uptime in his teams, so units with longer duration are more recommended. |
 Navia | Fischl’s excellent off-field Electro application allows Navia to frequently trigger Crystallize, increasing the number of Navia’s Crystal Shrapnel stacks and consequently her personal damage. As an Electro unit, Fischl stacks Navia’s A4 Passive, and Navia’s cooldowns can allow for shorter rotation times with high Oz uptime. |
Teams

This is not a comprehensive list of teams. The inclusion or exclusion of any given team does not necessarily reflect its power level.
Quicken

Fischl is a core member of many Quicken teams due to her A4 Passive’s high synergy with Quicken. As her A4 procs lack ICD, Fischl can trigger Aggravate every time the on-field character triggers an Electro-related reaction, up to once every 0.5s. Since Quicken makes every instance of Electro application trigger Aggravate, Fischl triggers an immense amount of Aggravate reactions with an Electro or Anemo driver.
Note: Running Nahida with an Anemo flex unit makes Swirling Electro more difficult due to Nahida’s 1.5U Dendro application. You can try to apply an Electro aura by using Normal Attacks to proc Fischl's C6 and A4 Passive, but even then it can be difficult maintain.
Example Teams

Rotation
(Keqing E) > Kazuha tEPQ > Kirara (Q)* shE > Fischl Q > Keqing E Q E N1C N1 E 3[N1C]
1Kirara uses her Burst only if holding 4pc Noblesse Oblige.
Kirara — Keqing — Fischl — Kazuha 15s rotation by casdela

Rotation
Zhongli hED > Nahida E Q > Fischl Q/E > Keqing E Q E N1C N1 E 3[N1C]
Nahida — Zhongli — Keqing — Fischl rotation by jyro10

Rotation
Yae 3[E] > Zhongli hED > Fischl E > Tighnari ECQ 2[C] > Yae Q N1 3[E] > Zhongli hED > Fischl Q > Tighnari E 3[C] > Yae 3[N2CD]
Tighnari — Yae — Fischl — Zhongli rotation by luno_

Rotation
Shinobu E Q > Kazuha tEPQ > Fischl E/Q > Tighnari E 2[C] > Kazuha tEP > Tighnari C Q
See the Tighnari Extended Guide for more details.
Tighnari — Fischl — Kazuha — Shinobu rotation by luno_

Rotation
Yae N1 3[E] > Yaoyao N1 E N1 > Fischl E N1 > Alhaitham hEP N3D N3 > Yae N1 Q 2[E] N1 E > Alhaitham Q > Fischl Q > Alhaitham N3D N3C 2[N3D] N3C N2
Alhaitham — Yae Miko — Fischl — Yao Yao rotation by idkanonymized

Rotation
Fischl E > Nahida E N1 Q N1C > Shinobu E > Alhaitham hEP 3[N3D] > Shinobu Q > Fischl Q > Alhaitham Q > Nahida N1 E > Alhaitham 4[N3D]
Alhaitham — Fischl — Nahida — Shinobu rotation by cynematic
Hyperbloom

Fischl provides great supplemental damage in Hyperbloom teams, since Oz inconsistently hits Dendro Cores. This allows another Electro unit to take ownership of Hyperbloom or an Anemo character to Swirl Fischl’s Electro application and trigger Hyperbloom. In teams with a slow Hydro applier, you sometimes have a leftover Quicken aura, leading to “Quickbloom” teams that maintain higher Quicken uptime while still allowing Bloom.
Example Teams

Rotation
Nahida E Q > Xingqiu EDQ N2 > Shinobu N1 E > Fischl N1 E/Q > Nahida 3N3D tE N3D > (Shinobu N1 Q)
Kuki — Xingqiu — Nahida — Fischl rotation by nikatosaurus

Fischl’s high Electro application can maintain an Electro aura for Sucrose to Swirl — these Electro Swirls can then trigger Hyperbloom on any Dendro Cores in range.
Rotation
Fischl E > Traveler EQ > Xingqiu EDQ N2 > Sucrose (Q) E 3[N3D] > Traveler E > Fischl Q > Sucrose combo
This team has a fairly flexible rotation. You use abilities off cooldown and drive with Sucrose.
Electro-Charged

Electro-Charged teams typically include Fischl, a Hydro unit, and an Anemo unit. Anemo drivers are more beneficial in AoE scenarios where their Swirls do more damage and they have higher ownership of Electro-Charged. In single-target scenarios, other drivers such as Raiden perform better.
Example Teams

Rotation with Sucrose
Fischl E > Sucrose EQ > Xingqiu Q N1 ED > Beidou E N1 Q N1 > Sucrose N1 E N2 ED > Fischl Q > Sucrose N2C N2 > Beidou E1 > Xingqiu N2 > Sucrose on-field (until Oz ends)
1Optionally Normal Attack with Beidou to catch her own particles.
Fischl — Xingqiu — Sucrose — Beidou rotation by .reimu.
Rotation with Heizou
Fischl E > Xingqiu EQ > Beidou N1 E N1 Q > Heizou N2C N3 Q N1 E > Fischl N1 Q > Beidou N1 E > Heizou N2C N3D N2C N3 E > Beidou E > Heizou N2C N1C
Heizou — Beidou — Fischl — Xingqiu rotation by luno_

Rotation
Neuvillette E > Furina ED Q > Jean EQ > Fischl E > Neuvillette C Q E C > Jean (N1) E > Fischl Q > Neuvillette 2[C]

Rotation
Fischl E > Furina ED > Kazuha tEP > Kokomi E > Furina Q > Kazuha Q tEP > Fischl Q > Kokomi Q combo > Kazuha tEP > Kokomi N2

Rotation
Fischl E N1 > Kokomi E N1 > Kazuha tEPQ > Beidou EQ > Kazuha N1 tEP > Fischl N1 Q > Kokomi N1 Q 5[N3D] > Kazuha tEP > Beidou E
Kokomi — Fischl — Beidou — Kazuha rotation by idkanonymized

Rotation
Fischl Q > Venti Q > Kokomi E > Kazuha tEPQ 2[N1 tEP] > Fischl E > Kokomi Q > Venti E > Kazuha N2 tEP N1 tEP
See the Kazuha Extended Guide for more details.
Fischl — Kokomi — Venti — Kazuha (4pc Thundering Fury) by jyro10
Overloaded

Fischl can pair with a Pyro unit (typically Bennett) to form an Overloaded core. These teams focus more on raw Electro and Pyro damage and treat Overloaded reactions as nice additional damage, so Fischl does not build EM.
Example Teams

Rotation
Yae 3[E] > Bennett EQ > Chevreuse Q hE > Fischl E/Q > Yae N2C > Bennett E N1 > Yae Q / 2[N2C]

Shorter Rotation
(Raiden E) > Bennett Q > Kazuha Q > Fischl Q > Raiden combo E > Bennett E > Kazuha tEP > Fischl (E)1
1Every other rotation due to Fischl’s 25s Skill CD.
Shorter Raifish rotation by itzsomebody
Longer Rotation
(Raiden E) > Kazuha tEP > Bennett EQ > Fischl (N2) Q > Kazuha Q > Raiden combo> (Fischl E)1 > Raiden E
1Every other rotation due to Fischl’s 25s Skill CD.
Longer Raifish rotation by itzsomebody
See the Raiden Extended Guide for more details.

Rotation
(Fischl C)1 > Chevreuse (Q) hE > Bennett EQ > Fischl E/Q > Gaming combo > Bennett E > (Gaming N2)
1First rotation only.
Overvape

Fischl is the premier Electro unit in Overvape teams with a Pyro DPS unit. When Fischl and a Hydro unit trigger the Electro-Charged reaction, both Electro and Hydro auras can coexist on the enemy. A single instance of Pyro application triggers both the Overloaded and Vaporize reactions, hence the name “Overvape.”
Example Teams

Rotation
Fischl E N1 > Xingqiu Q N1 > Bennett N1 Q E > Xiangling N1 Q N1 ED > Bennett N1 E > Xingqiu ED N2 > Fischl N2 Q > Bennett N2 E > Xingqiu N2 > Bennett N5 E > Xiangling N2 ED N1 > Bennett N2 E > Xiangling N2
Xiangling — Xingqiu — Bennett — Fischl rotation by idkanonymized

Rotation
Zhongli hED > Xingqiu Q > Fischl E/Q > Xingqiu E (N2)1 > Hu Tao combo
1Catch particles.

Rotation
(Yoimiya Q)1 > Zhongli hED > Yelan EQ > Fischl E/Q > Yoimiya E combo
1Use Yoimiya's Burst when available.
Fischl — Yoimiya — Yelan — Zhongli rotation by mishkaxp

Bennett should be on 4pc Thundering Fury. Regarding his combo, Bennett should continuously perform Normal Attacks and Skills until Xingqiu’s Burst ends. This is Bennett’s general rotation regardless of whether he is C6 or not.
Rotation
Xingqiu EDQ N1 > Bennett E N1 Q > Fischl N2 Q > Lisa Q > Bennett combo> Fischl E N1 > (Lisa hE) > Bennett E N1
Fischl — C6 Bennett (4pc Thundering Fury) — Xingqiu — Lisa rotation by jyro10
Anemo Overvape

A subclass of Overvape teams, Anemo Overvape mixes Electro, Hydro, Pyro, and Anemo together to trigger many reactions (such as Electro-Charged, Overloaded, Vaporize, and Swirl). Fischl is the best enabler for the Electro reactions in Anemo Overvape teams.
Example Teams

Rotation
Ayato Q > Fischl E > Kazuha tEP > Ayato E N15 > Bennett EQ > Fischl Q > Kazuha tEPQ > Ayato E N15
See the Ayato Extended Guide for more details.
Ayato — Fischl — Kazuha — Bennett rotation by miannes

Note that this team, informally referred to as “Sukokomon,” has a unique, mechanically-intensive playstyle. See its entry in the KQM Team Compendium for more information before playing it.
Rotation
Fischl E > Kokomi E > Xiangling E > Sucrose N1 E N2 E N1 > Xiangling Q > Kokomi Q N2C N2D N2C > Fischl Q > Xiangling E > Sucrose N1 E N1 Q 5[N3D]
Read the description on Terraflop’s video for more information.
Fischl — Kokomi — Xiangling — Sucrose (Sukokomon) rotation by Terraflop
Physical DPS Support

Fischl’s off-field Electro application, when paired with a Cryo unit, enables Superconduct to decrease enemy Physical RES for a Physical DPS. If no other teammate holds 4pc Tenacity of the Millelith, it becomes Fischl’s BiS artifact set in Physical teams when facing multi-target content.
Example Teams

Rotation
Fischl E/Q > Rosaria E > Diona 1–2[hE] > Eula E > Rosaria Q > Eula Q N4 hE N4 > Rosaria E > Eula N4D N4
See the Eula Extended Guide for more details.
Sacrificial Bow Diona rotation by scrunglebepis
No Sacrificial Bow rotation by idkanonymized
Geo DPS Support

Fischl’s off-field Electro application allows Geo units to consistently trigger Crystallize and consequently activate Geo Resonance without needing Zhongli. Navia also makes great use of Crystallize shards to empower her Elemental Skill.
Example Teams

Rotation
Zhongli hED N1 > Navia Q > Bennett tEQ > Fischl E/Q > Navia 2[E N3D N2] > Bennett tE N1
Fischl — Navia — Zhongli — Bennett rotation by baloopy

Rotation
Albedo E > Bennett EQ > Fischl E/Q > Ningguang EQ (E) C > Bennett E > Ningguang 2[N2C]
Fischl — Ningguang — Albedo — Bennett rotation by baloopy
Credits
“It was fate that saw to your descent upon this world, destiny that saw our paths intertwined. I, Fischl, shall always protect you. Because... because fate has revealed to me that this is what has been decreed!”
The Fischl guide is a result of the cumulative efforts of generations of Genshin theorycrafters, and after over two years is finally out for all to see. On behalf of the KQM staff, we hope that you enjoy this guide and appreciate the work and expertise of all of the amazing people below.
- Writing: mathperson, itzsomebody, aluminiuminum, cuppacote, nikatosaurus, zhundred
- Calculations: itzsomebody, mathperson, .athena.
- Editing: leah2212, cuppacote, idkanonymized, irokei, polomo
- TC Contribution:
- On-Field Fischl: paraszczak, laevatienn, imaginebeinggoodatthegame, Physchl#1924, ottobon, itzsomebody
- Mechanics: bowtae, nzpieface, wesu., paichlear, thighrelia
- General Advice: hungrydave, cuzimori, jamie9248, jamberry, jstern25, bobrokrot, vinsette, yukiyafuyu, caramielle., nikatosaurus, caxia5, baloopy, vanitasinanisa
- Document Formatting: cuppacote, zhundred
- Rotation Recording: itzsomebody, yukiyafuyu, idkanonymized
- Transcription: uhinf1999, irokei
References
- Off-Field Calculations:
- On-Field Calculations (UNVERIFIED):
- Constellations:
- Talents
- Weapons
- Artifacts

 Ascension 1 Passive | Stellar Predator
 Ascension 4 Passive | Undone Be Thy Sinful Hex
 Utility Passive | Mein Hausgarten